The first step is to open your favorite Web browser, then navigate and login to Office.com.
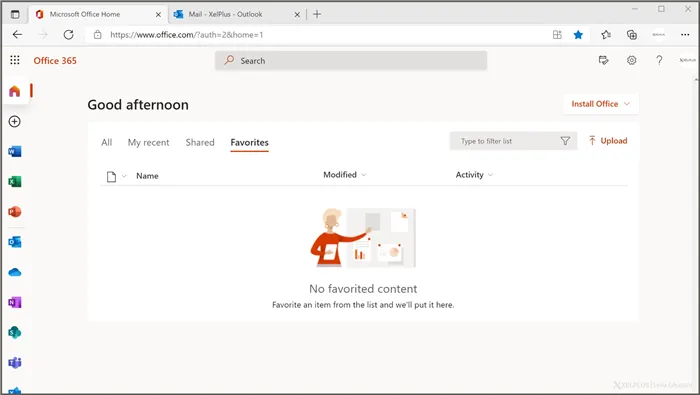
Setting Up a Form
Start the Forms app by selecting the App Launcher and clicking the Forms app.
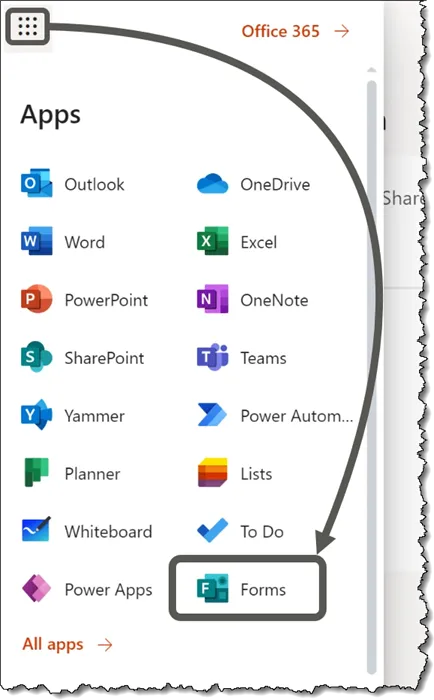
NOTE: If you don’t see the Forms app listed, click All Apps to reveal the complete list of Microsoft apps.
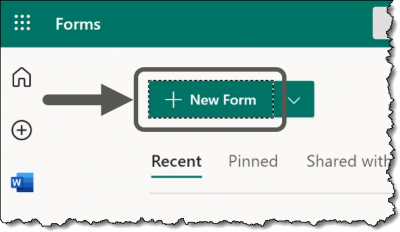
In the Forms app, click New Form.
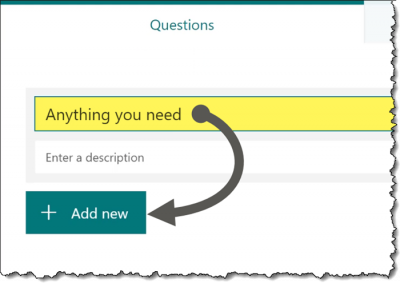
We’ll keep this simple and call the form “Anything You Need”, then click Add New to create our first question.
Our first question will solicit the user’s name. We’ll use a Text-based question for this.

We’ll use “Your Name” as the prompt and click Add New to continue.
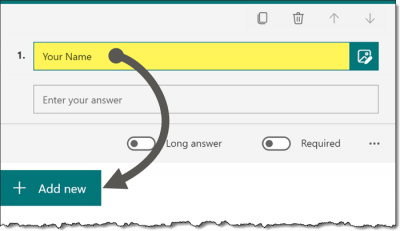
The next question will be a Choice-based question.

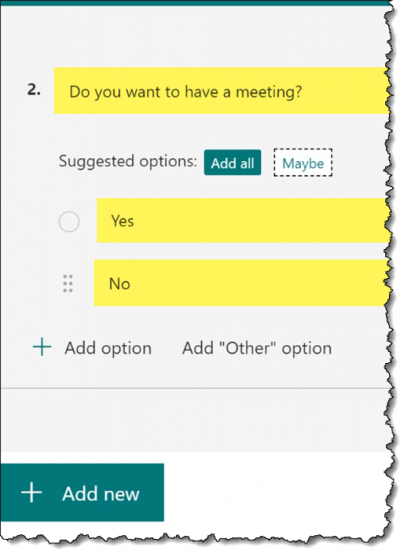
We’ll check to see if the client requires a meeting.
Enter “Do you want to have a meeting?” in the question field and set the option responses to “Yes” and “No”.
Click Add New when finished creating this question.
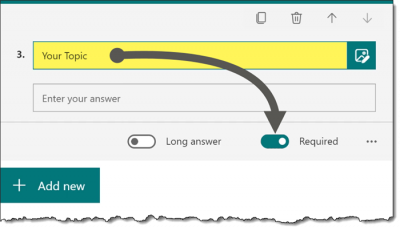
Lastly, we want to find out what the meeting is about, so we’ll create another Text-based question labeled “Your Topic”. We want this question to be a required response, so set the Required option to On.
Now that we have created our form, let’s move on to setting up the notification process.
Featured Course
Excel Essentials for the Real World

Setting Up Notifications Using Power Automate
We want to be notified if someone selects the “Yes” option for a meeting request.
We want to receive an email notification with their name and meeting topic.
Let’s create a Flow using Power Automate.
As we did earlier, start the Power Automate app by selecting the App Launcher and clicking the Power Automate app.
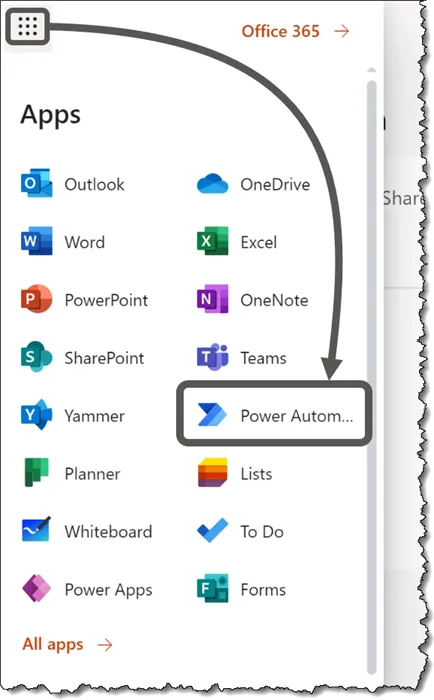
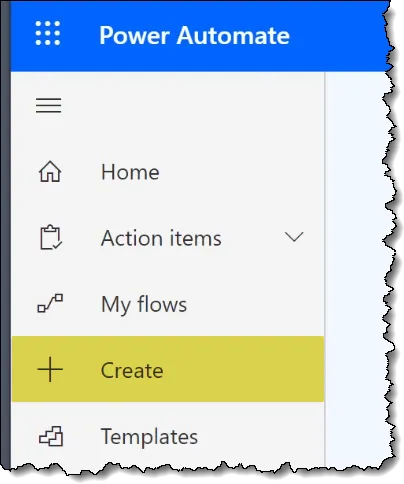
In the Power Automate opening page, click Create on the left side of the window.
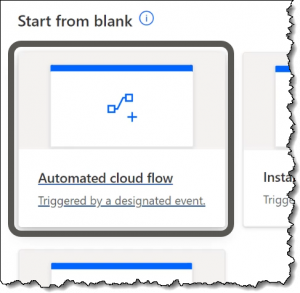
This Flow will be an Automated Cloud Flow because it’s triggered by an event.
We’ll name our Flow “Meeting Request” and select the trigger option “When a new response is submitted” using Microsoft Forms.
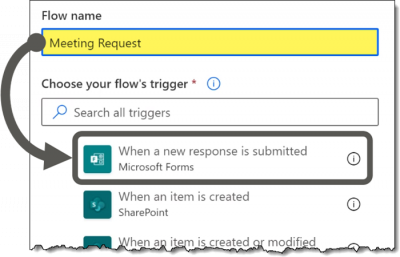
Click Create when finished.
Setting Up the Trigger’s Logic
To define the steps taken if the trigger is activated, begin by selecting the form we created earlier named “Anything You Need” from the Form ID dropdown list.
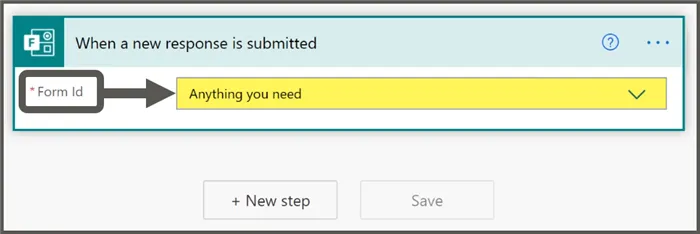
Click New Step to continue.
In the Choose an Operation panel, type the word “form” in the Search panel, then select Microsoft Forms from the list of returned apps.
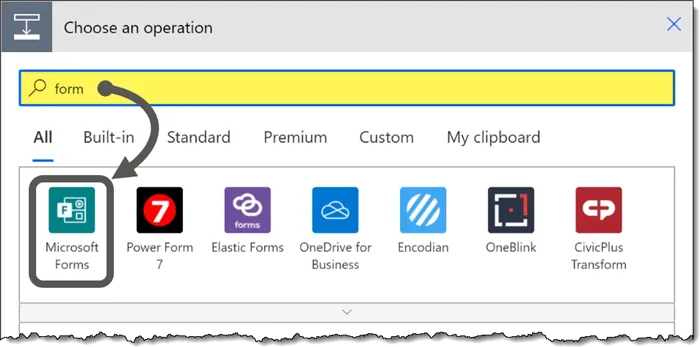
If necessary, select the Actions panel to reveal all Microsoft Forms actions.
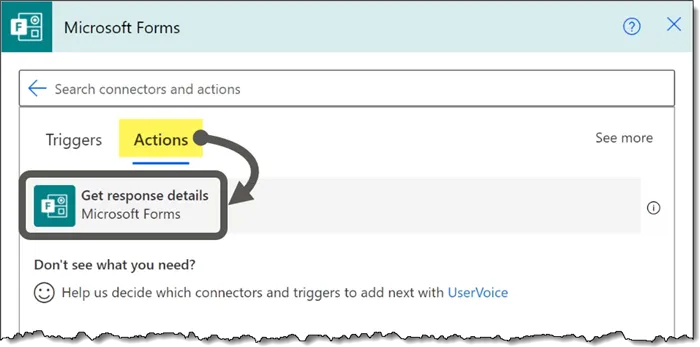
Select Get Response Details from the list of Actions.
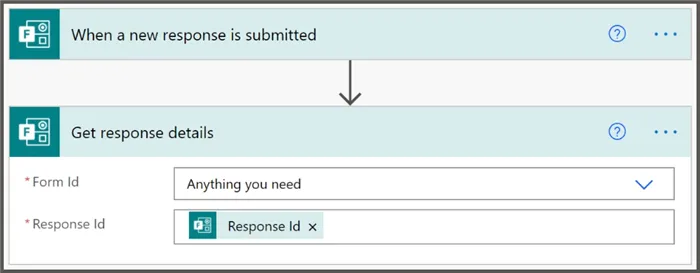
In the Get Response Details panel, set the Form ID to the form name we created earlier (“Anything You Need”).
For the Response ID, clicking the field reveals the Dynamic Content list. We have but one option labeled Response ID.
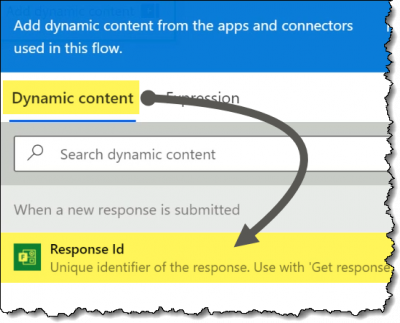
Selecting this option will allow Power Automate to collect responses from your form.
Featured Course
Unlock Excel VBA & Excel Macros

Adding the Collection Condition
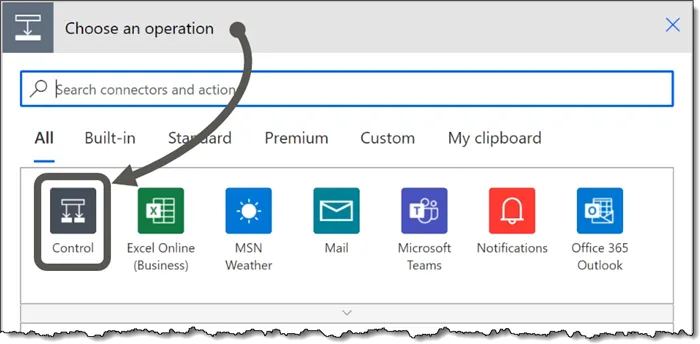
Click the New Step button to open the Choose an Operation panel and select Control.
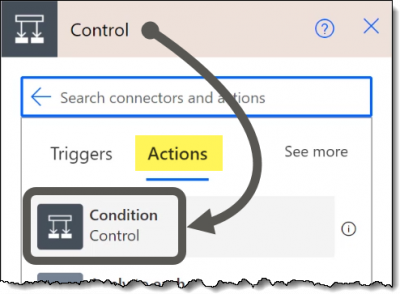
Select Condition.
Select the survey question created earlier labeled “Do you want to have a meeting?” and click Add.
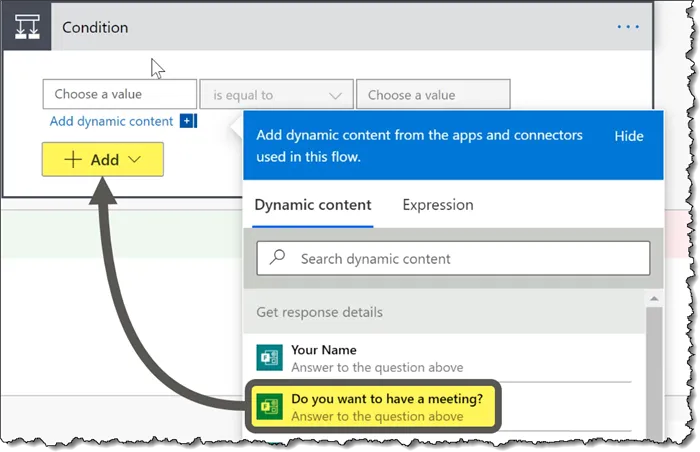
Set the condition to “Is Equal To” and “Yes”.

NOTE: Be mindful that the response you are looking for is CASE-SENSITIVE. Ensure you have typed the response you are looking for in the same case style as it appears in the form.
Adding the Action to be Performed
The next step is to set the action to be performed if the established condition is met.
In the If Yes panel, select Add an Action.
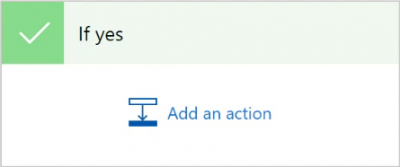
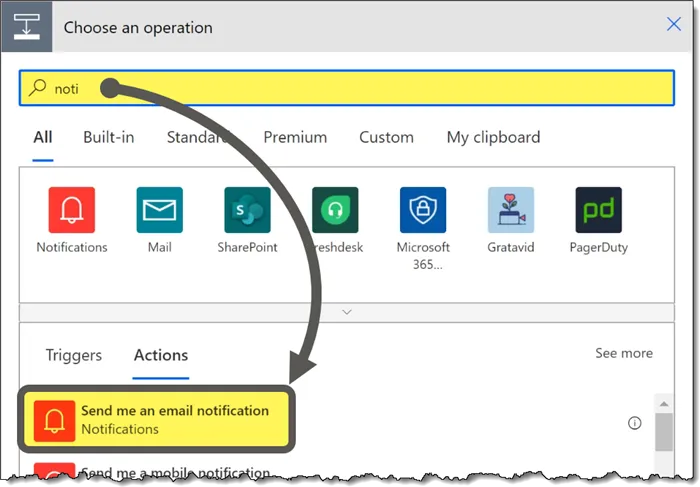
We want to receive an email notification. In the Search bar, type “noti” which should be enough to display the “Send me an email notification” option.
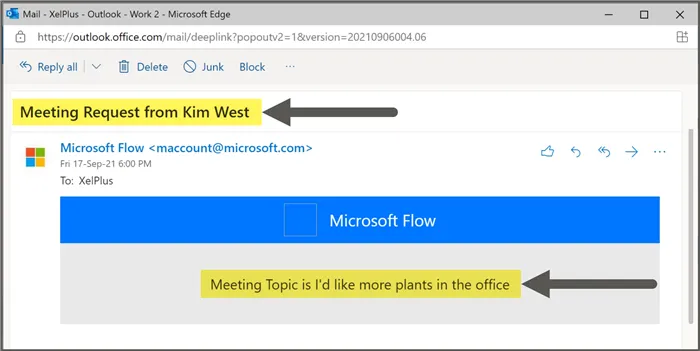
In the Send me an email notification panel, set the Subject to be “Meeting request from” then from the Dynamic Content panel, select “Your Name” from the list of form questions.
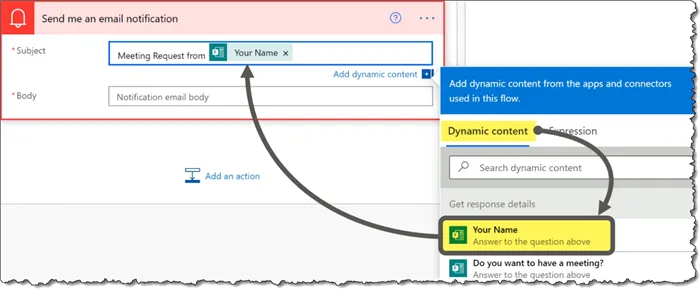
This will append the survey participant’s name to the end of your subject line, making the subject more specific.
Now set the Body to be “Meeting topic is” then from the Dynamic Content panel, select “Your Topic” from the list of form questions.
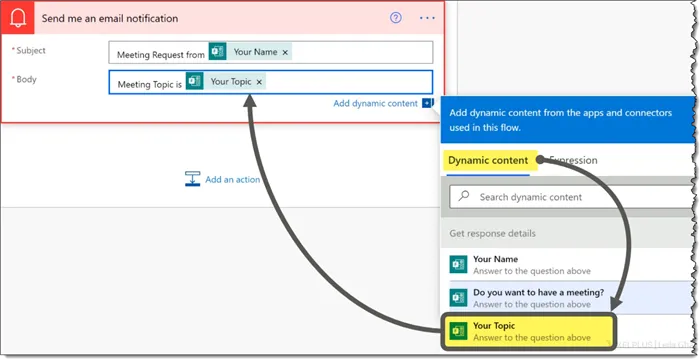
This will produce the same dynamic behavior in the Body as it does in the Subject.
Click Save to complete the process.
Testing the Auto-Notification Process
To test the newly-created notification process, in the upper-right corner of the window, click the Test button.

Select Manually and click Test to perform a forced test.
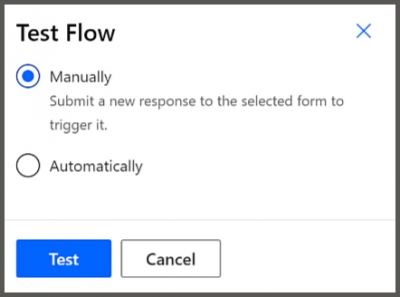
The system is waiting for us to submit a test response.

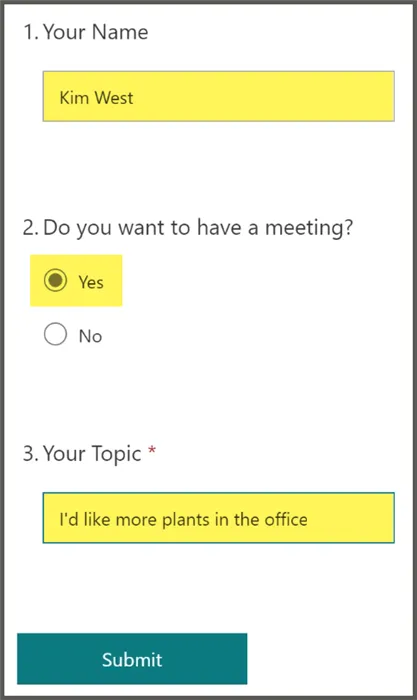
Return to the survey form and fill it out in a way that requests a meeting with a subject.
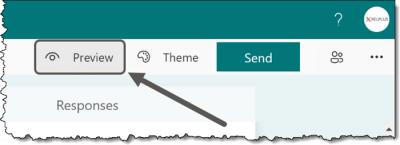
Select Preview.
Fill the form out with a test set of responses.
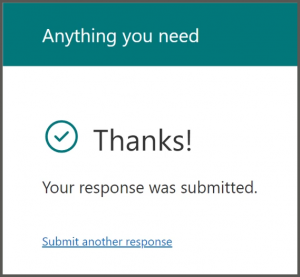
Click Submit to send the survey responses into the system.
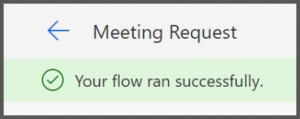
Returning to the Flow window, we can see that the Flow ran successfully.
Checking our email, we can see that a new message has arrived with the expected information.
Final Thoughts
That’s the beauty of Power Automate. This tutorial shows how you can use it with Forms and Email to help ensure you don’t miss important feedback.
Leila Gharani
I'm a 6x Microsoft MVP with over 15 years of experience implementing and professionals on Management Information Systems of different sizes and nature.
My background is Masters in Economics, Economist, Consultant, Oracle HFM Accounting Systems Expert, SAP BW Project Manager. My passion is teaching, experimenting and sharing. I am also addicted to learning and enjoy taking online courses on a variety of topics.


