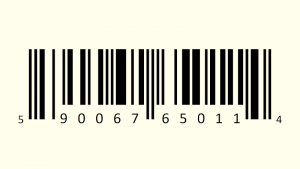
We begin our journey by entering three values into our spreadsheet:
- 1 digit for Type
- 5 digits for Manufacturer
- 5 digits for Product
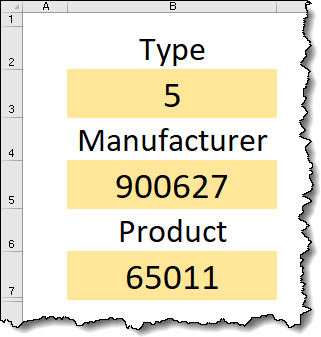
Upon entering the above values, the barcode is generated.
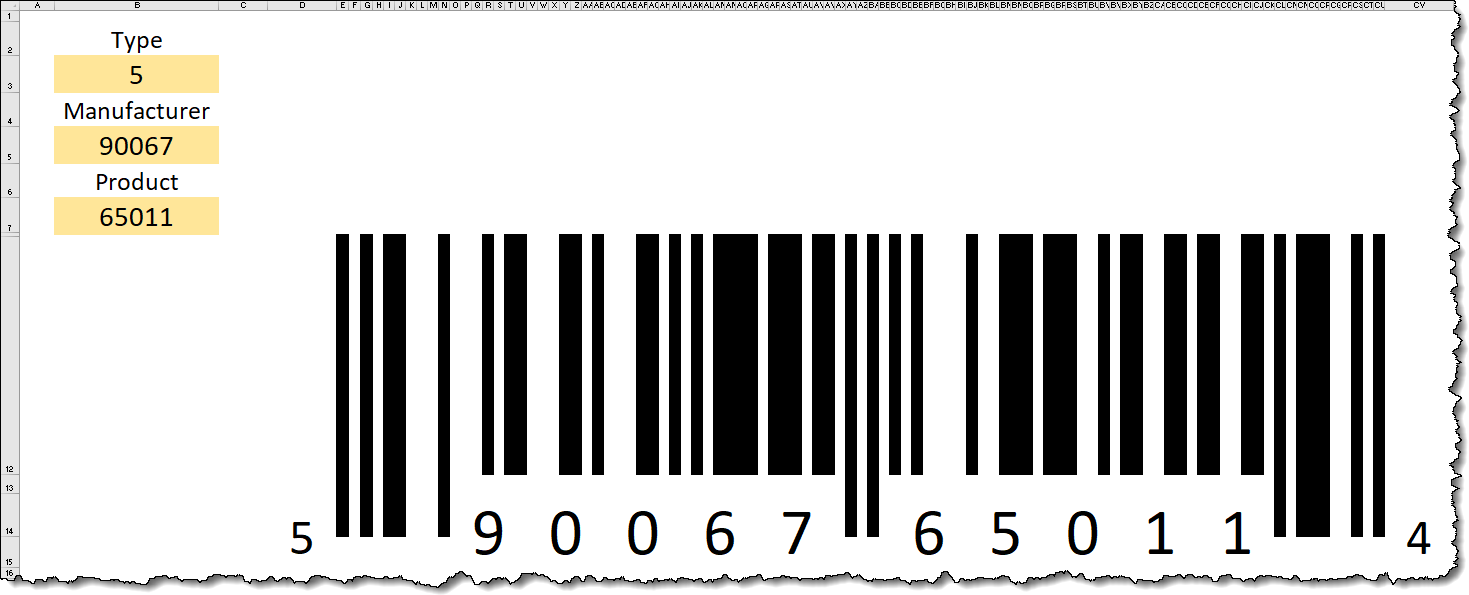
Like any good magic trick, it looks complex but it’s really quite simple once you understand it.
(click any of the following images for a larger view)
Main Parts of a Barcode
The Guards
The highlighted areas below are known as the “guards”. These are fixed in design and do not change with different products. The guards serve as borders for the scanner to know where the start and endpoints of the relevant information are located.

Type of Barcode
The left-most value defines the type of barcode.

The values seen here are defined as:
- 0 = Standard
- 2 = Weighed Items
- 3 = Pharmacy
- 5 = Coupons
Manufacturer Code
The left-set of 5 digits represent the manufacturer code.

Product Code
The right-set of 5 digits represent the product code.

Modulo Check Character
The right-most value is automatically generated. This is known as the Modulo Check Character.

This value is generated using the formula below.
3 × (1 + 3 + 5 + 7 + 9 + 11) + (2 + 4 + 6 + 8 + 10)The values in the parentheses are the digit positions for the 11 numbers as read from left to right.
Using the above example, the formula would appear as follows:
3 × (5 + 0 + 6 + 6 + 0 + 1) + (9 + 0 + 7 + 5 + 1)This would evaluate to 76.
We then subtract that value from the next highest multiple of 10, in this case, 80, giving us a value of 4.
80 – 76 = 4Generating the Black Bars
The black lines are generated from the two sets of numbers that define the manufacturer and the product.
If we look closely, we can see that each number is defined by 7 thin bars (we’ll call them “tracks”.)
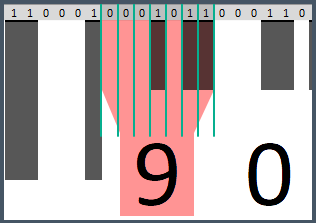
Each of the 7 “tracks” shadings is defined by a corresponding 0 (zero) or 1 in that track. If the track is 1, the track is filled with the color black. If the track is 0, then the track is left white.
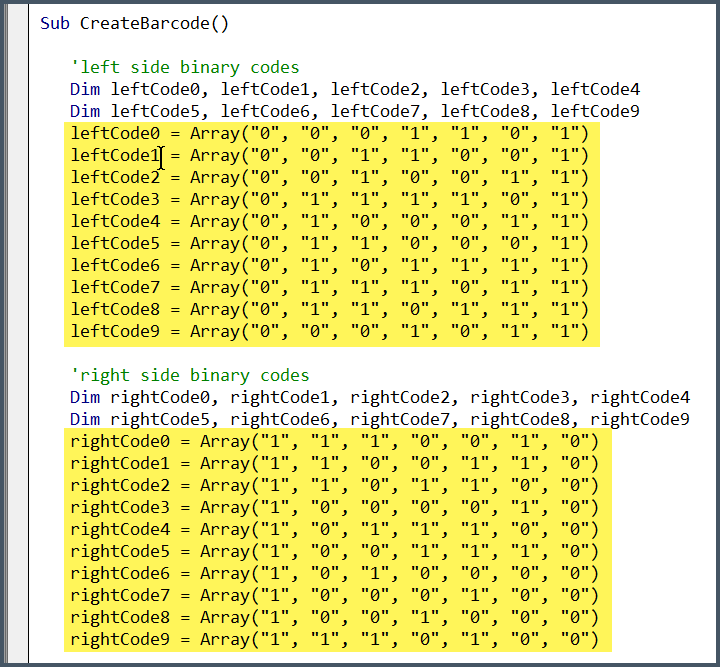
The table below lists the combinations of 1’s and 0’s for the values of 0 through 9. There is a separate set of code combinations for the left side (manufacturer) and the right side (product).
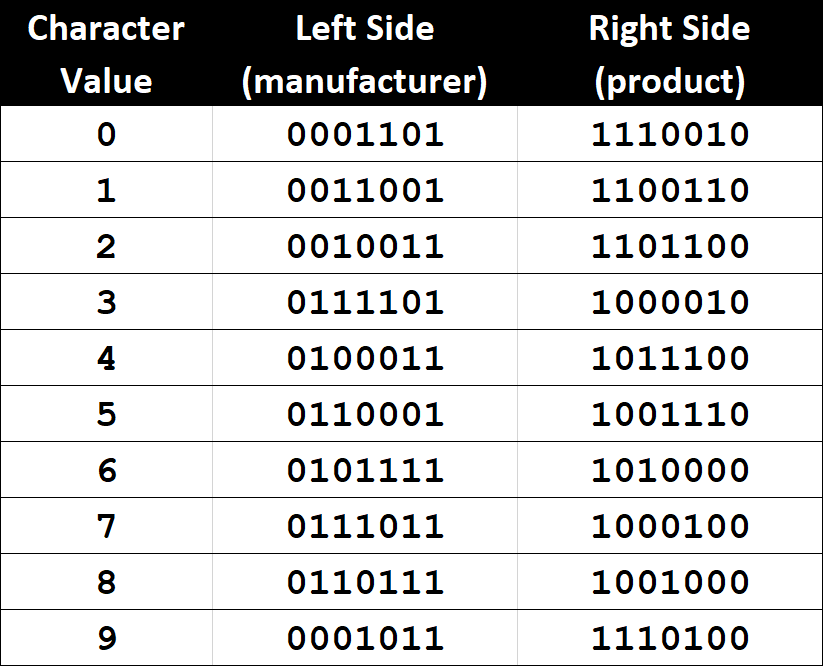
If you look closely, you’ll notice that the right side of 1’s and 0’s as an inversion of the left side of 1’s and 0’s.

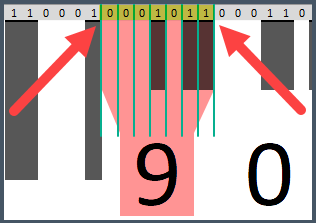
Returning to our example from above; a value of 9 on the left side (manufacturer) is represented by the 0/1 sequence of 0001011.
The Complete Package
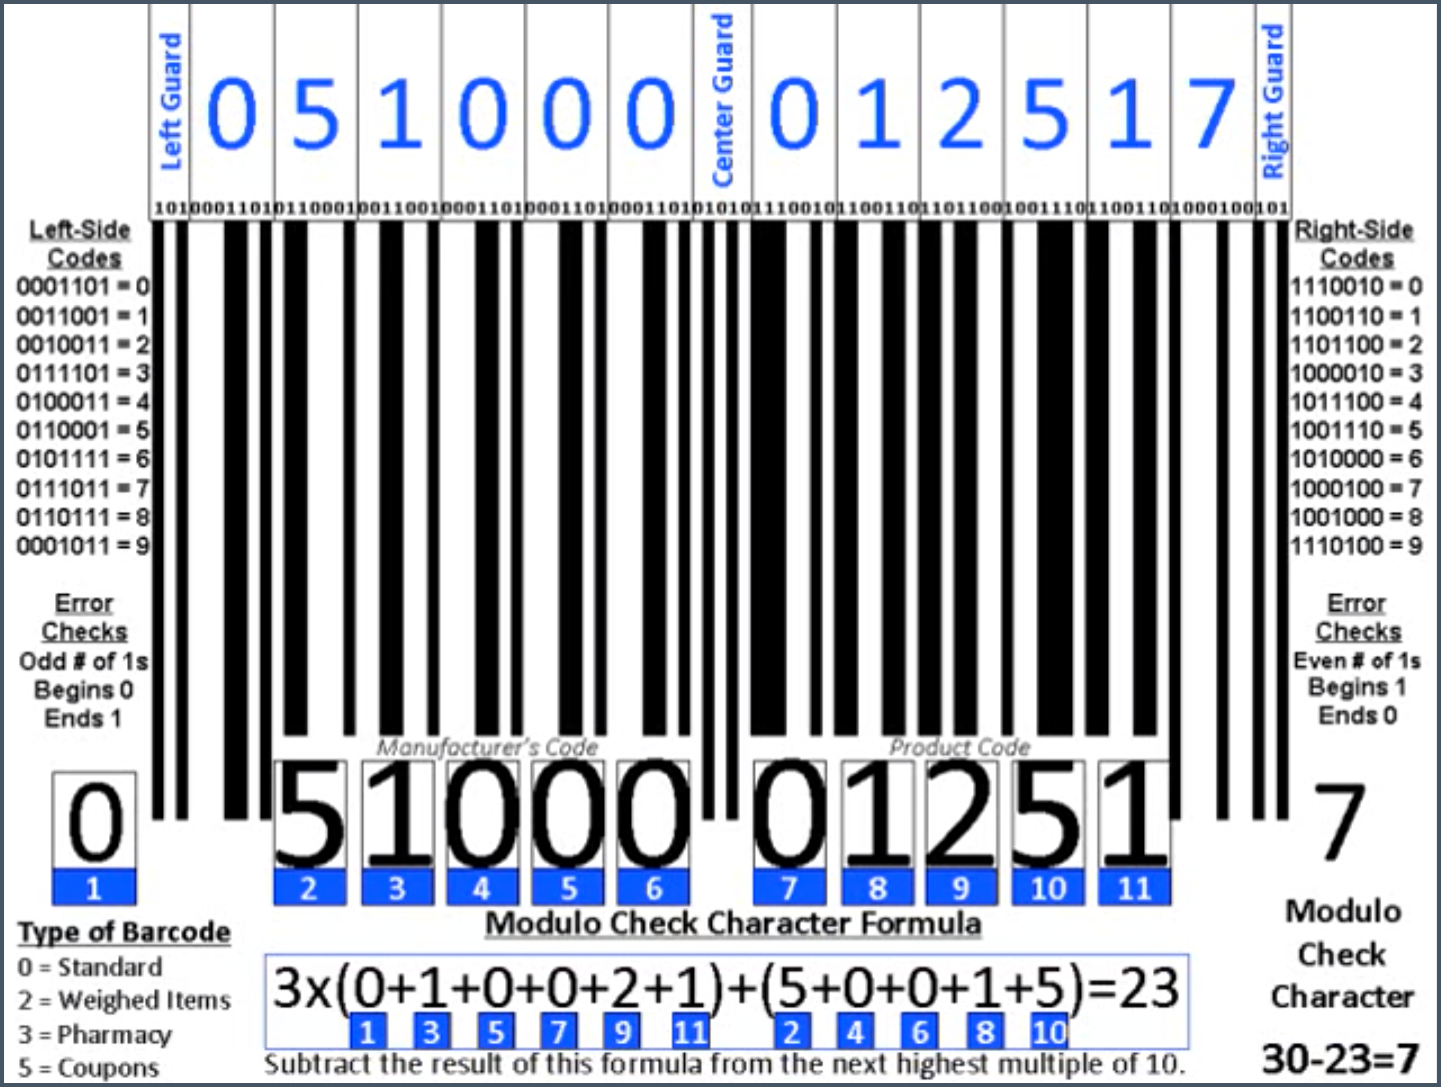
The below image (courtesy of In One Lesson entitled “How Barcodes Work”) shows how all of the components fit together.
Creating the Barcodes in Excel
Let’s break the worksheet into its components to see exactly which Excel features control which parts of the barcode result.
Named Ranges
If we select the leftmost value (the barcode type), we see that the cell is referencing a named range called “typeNumber” (cell B3).
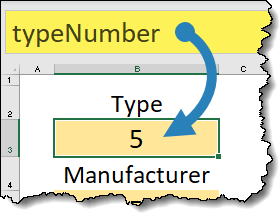
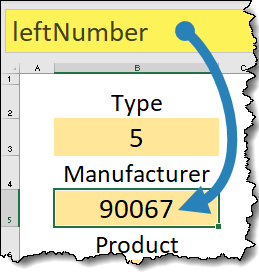
The manufacturer code (left set of 5 digits) has each value contained in a single, merged cell. Each cell is referencing a named range called “leftNumber” (cell B5).
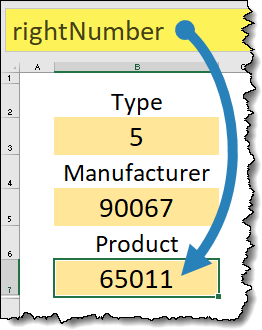
The product code (right set of 5 digits) has each value contained in a single, merged cell. Each cell is referencing a named range called “rightNumber” (cell B7).
Text Functions
Each of the values in the manufacturer’s code is using a text function to extract a single character from the 5-digit value stored in “leftNumber”.
These functions are as follows (reading from left to right):
- Position 1 – LEFT(leftNumber)
- Position 2 – MID(leftNumber, 2, 1)
- Position 3 – MID(leftNumber, 3, 1)
- Position 4 – MID(leftNumber, 3, 1)
- Position 5 – RIGHT(leftNumber)
Each of the values in the product’s code is using a text function to extract a single character from the 5-digit value stored in “rightNumber”.
These functions are as follows (reading from left to right):
- Position 1 – LEFT(rightNumber)
- Position 2 – MID(rightNumber, 2, 1)
- Position 3 – MID(rightNumber, 3, 1)
- Position 4 – MID(rightNumber, 3, 1)
- Position 5 – RIGHT(rightNumber)
Modulo Check Character Calculation
The Modulo Check Character is referencing a named range called “moduloCheck” (cell B9). These rows are hidden, so you’ll need to unhide the rows to see the “moduloCheck” cell and its related formula.
The formula behind the modulo check is the same as the one stated earlier:
3 × (1 + 3 + 5 + 7 + 9 + 11) + (2 + 4 + 6 + 8 + 10)(Remember – the numbers in the parentheses represent number positions as read from left to right)
When translated into Excel, the formula looks like so…
=MOD(10 - MOD((3 * (B3 + MID(B5, 2, 1) + MID(B5, 4, 1) + LEFT(B7) + MID(B7, 3, 1) + RIGHT(B7)) + (LEFT(B5) + MID(B5, 3, 1) + RIGHT(B5) + MID(B7, 2, 1) + MID(B7, 4, 1))), 10), 10)I know, it looks insane, but if you study it closely it’s performing the following steps:
- Individual number extractions using the LEFT, MID, and RIGHT functions
- Add the left 5 and right 5 values
- Multiply the left result by 3
- Add the result to the right side
- Use a modulo function to divide the result by 10 and retain only the remainder
- Subtract the result from 10
- Use a modulo function to divide the result by 10 and retain only the remainder
The reason for the second modulo function is to account for results where the remainder would be zero. If that occurs, Step 6 would be 10 – 0 which results in 10, and we can’t return a double-digit result to the Modulo Check Character position.
Generating the Black Bars (Conditional Formatting)
Notice that all the columns that contain the visualization of the barcode are very narrow.

A cell in this range will either be black or white. The color is predicated on the presence of a 1 (for black) or a 0 (for white).

A Conditional Formatting rule has been set to have a cell “look” at its respective value and set the cell to black if a 1 is present or white if a 0 is present. If we select cell H12 and select Home (tab) -> Styles (group) -> Conditional Formatting -> Manage Rules, we see the rules for H12 and range of examination for the rest of the barcode color cells.
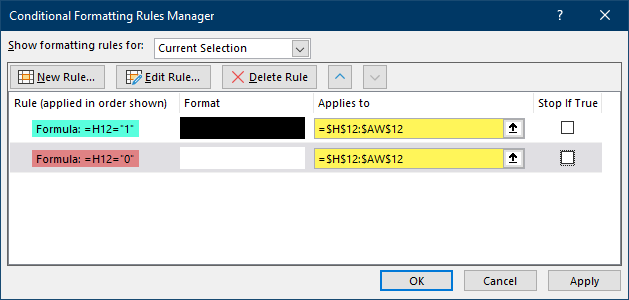
The alteration of the 1’s and 0’s is controlled by VBA code that we will examine in just a moment.
Since the Left, Right, and Center guards are fixed, those are manually colored and are not dependent on Conditional Formatting.
A Closer Look
Examining the first few digits of our barcode (5 90067 65011 4), we can consult the binary conversion chart from earlier and note the following binary patterns:
- 5 = 0110001
- 9 = 0001011
- 0 = 0001101
- 6 = 0101111
The 1/0 patterns can be seen in the sets of 7 below.

Peeking Behind the Curtain (a Bit of VBA Automation)
Decoding the user-entered values into sets of 1’s and 0’s is handled by some clever VBA code.
To see the code, press the key combination ALT-F11, then double-click the “Module 1” module sheet in the Project Explorer windows (left).
If you are interested in learning VBA, consider our VBA course titled “Unlock Excel VBA & Excel Macros”.
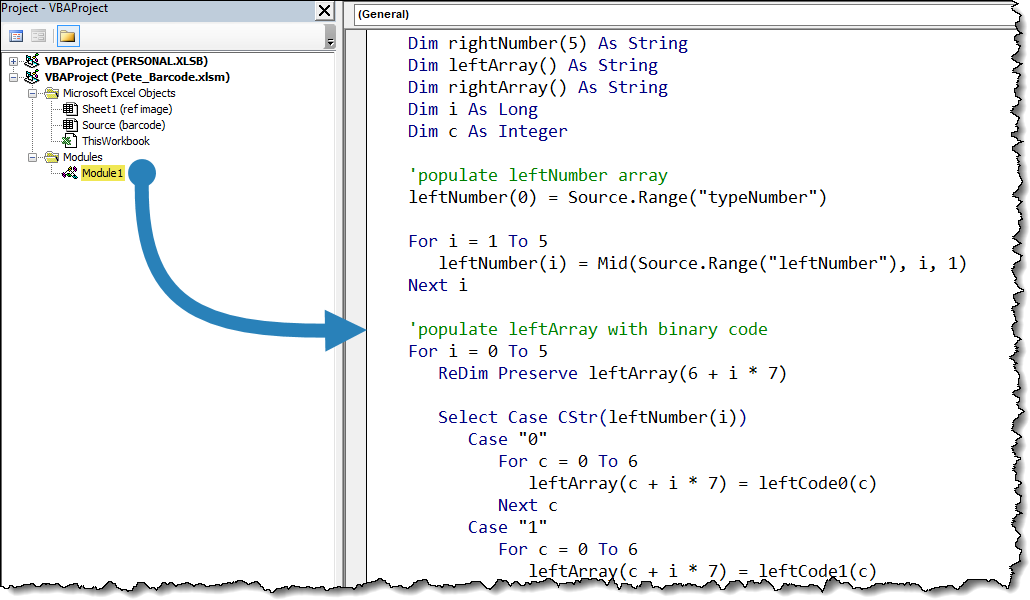
Although we won’t be dissecting this code line for line, let’s generalize the major steps.
Generating the Binary Code for the Left and Right Sets of Numbers
The code begins by creating 20 variables, 10 for the left set of numbers 1 through 9, and 10 for the right set of numbers 1 through 9.
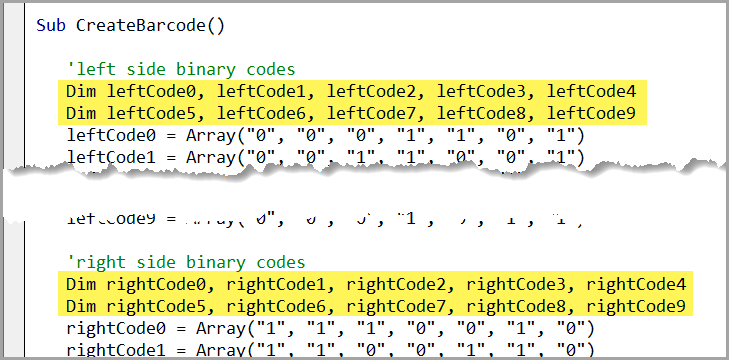
Each of the variables is then populated with a set of 7 1/0 combinations that correspond to our number-to-binary table from earlier.
Converting the Numbers to Binary
Next, a loop routine parses each of the user-entered values to determine its value of 0 to 9. A Select Case statement will pick the associated array of 1’s and 0’s from the previous step and store the results in a new memory array.
This is done for the left set of values (manufacturer), then again for the right set of values (product).
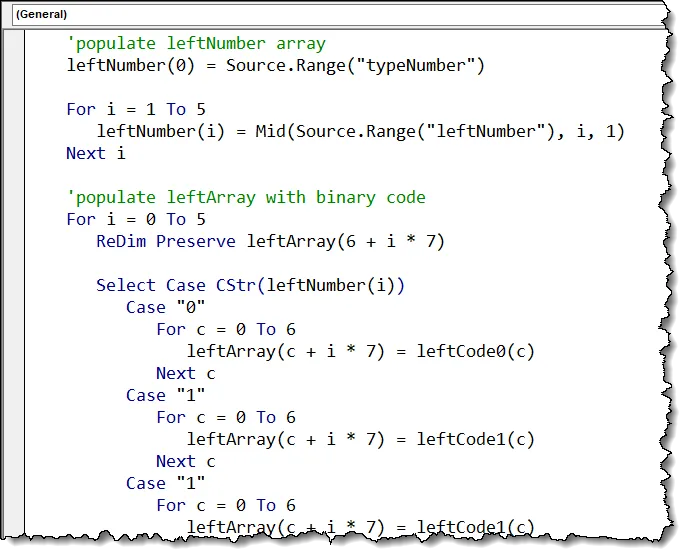
Once the final arrays have been assembled, those arrays are copied to the worksheet. These are discovered by virtue of Named Ranges called “leftArray” and “rightArray”.

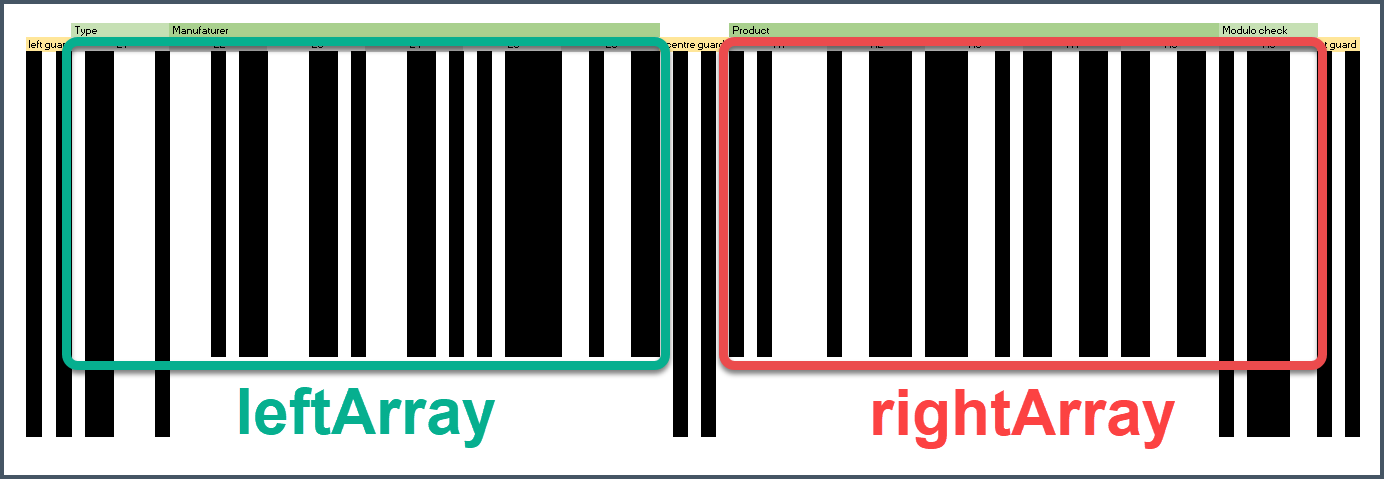
The bars height is achieved by stretching the height of the row containing the 1’s and 0’s.
Adding a Touch of Dynamism
(that’s a fancy word)
Because we want the barcode to update when new values are entered for the type/manufacturer/product cells, a bit of code is entered to detect when one of these three cells have been changed.
This code has two special properties:
- The code is stored on the codesheet for the sheet holding the visualization named “Barcode”.
- The code is placed in a special type of procedure called an Event-Driven Procedure; in this case, an event called Worksheet_Change.

Each line monitors one of the three entry cells as named “typeNumber”, “leftNumber”, and “rightNumber”. If an update to any of these three cells is detected, the CreateBarcode subprocedure is called (located on the previously examined “Module 1” sheet) and executed.

A Bit of Polish with Some Data Validation and VBA Error Checking
Data Validation
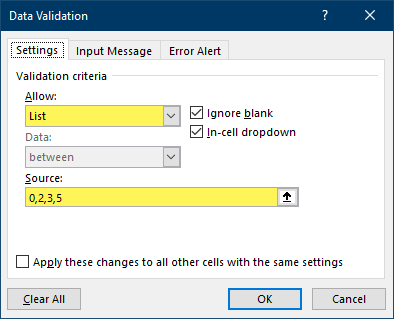
To ensure a user selects only 1 of the valid 4 Type codes, and that the user always enters exactly 5 numbers for the manufacturer code and product code, Data Validation has been applied to the three data entry cells.
For the Type cell (B3), a validation List allowing the numbers 0, 2, 3, or 5 has been applied.
For the Manufacturer and Product cells (B5 and B7 respectively), a Text Length requirement of exactly 5 characters has been applied.
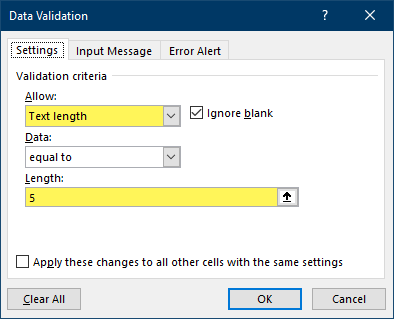
Keep in mind, this would allow for letters and punctuation to be entered by the user, effectively sending this down the hole of failure.
For more robust data validation, we could create a custom validation formula like the following to restrict only numbers and exactly 5 of those numbers.
For Manufacturer (cell B5):
=AND(LEN(leftNumber) = 5, ISNUMBER(VALUE(leftNumber)))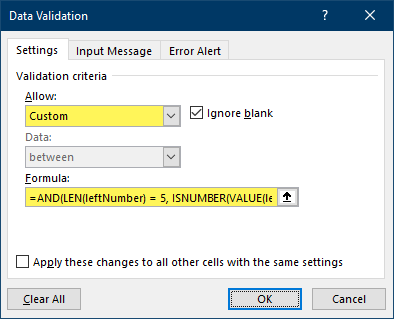
For Product (cell B7):
=AND(LEN(rightNumber) = 5, ISNUMBER(VALUE(rightNumber)))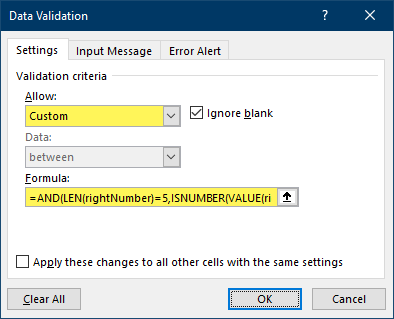
VBA Error Checking
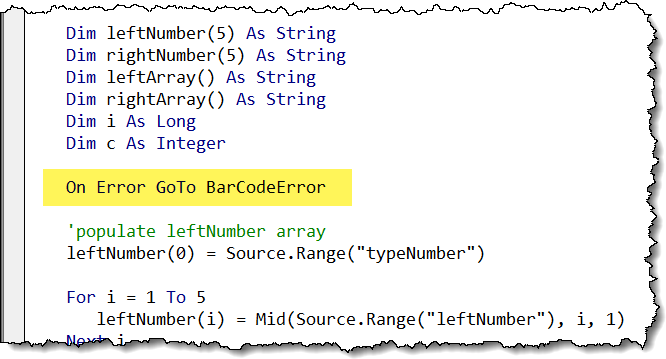
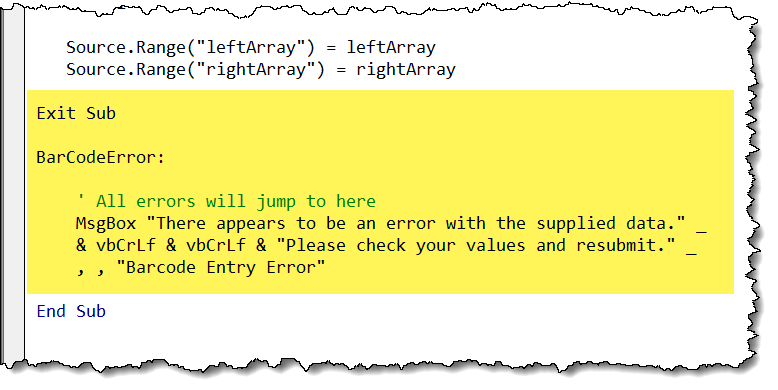
If an error were to be encountered during execution of the “CreateBarcode” subprocedure, we can include an error handling routine to inform the user than an error has occurred and to check their entered values.
We can place an instruction directly after our variable declarations to tell the system to skip to the end of the code and execute the error-handling routine in the event of an error.
If the error-handling routine is invoked, we can display a message box informing the user of some malfunction and to let them try a new code set.
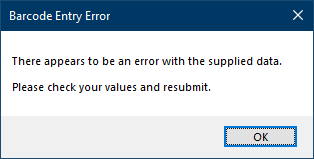
The error would appear as follows.
Download Different Versions of the Excel Barcode Generator
Thanks to our community members we have different versions you can download:
Download Pete’s original version with Excel VBA HERE.
Barcode generator with INDEX & MATCH from Max Vitzliputzli: Download HERE.
Barcodes with VLOOKUP from David Barahona: Download HERE.
and finally barcodes in Excel with OFFSET from Boko Moko: Download HERE.
MANY THANKS to our contributors for sharing their versions and inspiring us to learn from one another.
Leila Gharani
I'm a 6x Microsoft MVP with over 15 years of experience implementing and professionals on Management Information Systems of different sizes and nature.
My background is Masters in Economics, Economist, Consultant, Oracle HFM Accounting Systems Expert, SAP BW Project Manager. My passion is teaching, experimenting and sharing. I am also addicted to learning and enjoy taking online courses on a variety of topics.


