Let’s look at two examples of using Power Automate with Excel.
- How to record your working hours directly into a spreadsheet using your mobile device.
- How to create a LinkedIn post from Excel.
Featured Course
Excel Essentials for the Real World

Example #1 – Post Working Hours
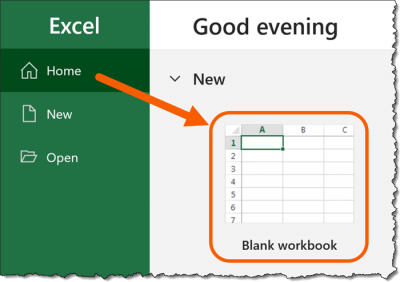
Setting up the Excel file to store the entries
The first step is to create an Excel workbook that will receive and record the working hours.
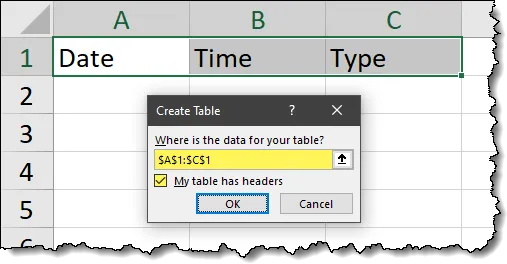
Next, we create a heading row for a table with the fields we want to document. We want to record the Date, the Time, and the Type of task either starting a task or ending a task.

Now we will select the heading row and press CTRL-T or select Insert (tab) -> Table to convert this into a proper Excel Table.

To give this table a better name, click the Table Design tab and change the table name to “TableTime”.

IMPORTANT: Because we are creating what is known as a “Cloud Flow”, we need to save this file on either a OneDrive or SharePoint site.
Creating the Power Automate Component
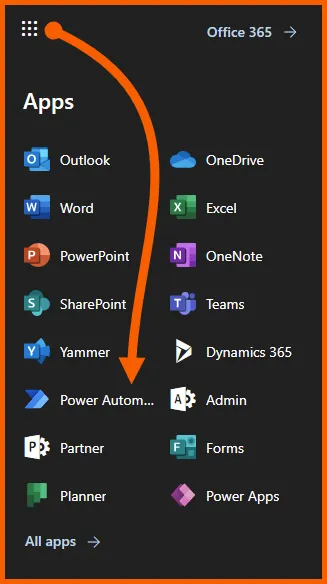
Log in to Office.com and launch the Power Automate app.
The flow that we will create is going to be triggered by us and created from scratch. We start by clicking Create from the left panel of options.
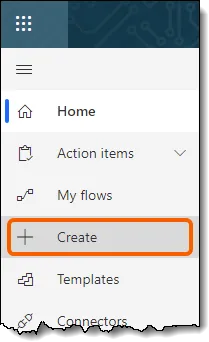
Select the “Instant Cloud Flow” option to begin creating a new flow.
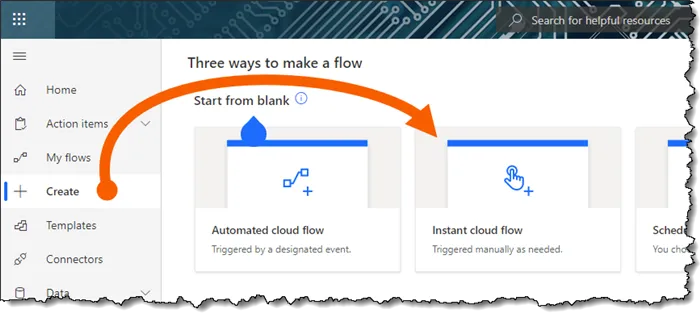
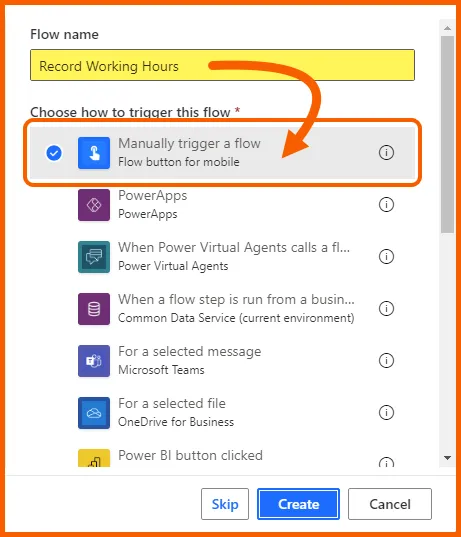
Give the new flow a name, such as “Record Working Hours” and select the option labeled “Manually trigger a flow” and click Create.
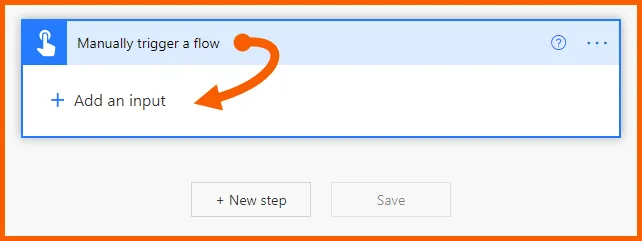
We have our first step to “Manually trigger a flow”, but we need what are called Inputs.
Click the banner labeled “Manually trigger a flow” and select “Add an Input”.
We are given the option to select from a variety of input types.
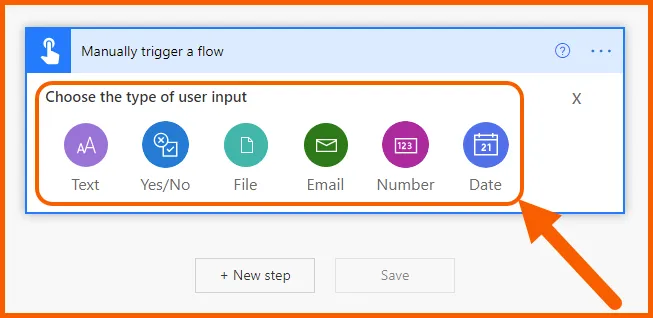
We will select the “Yes/No” input type.

We are tracking either our starting or ending working hours. Update the title that currently says “Yes/No” with “Start?” and the prompt text from “Please select yes or no” to read “Yes for Start, No for End”, then click New Step.
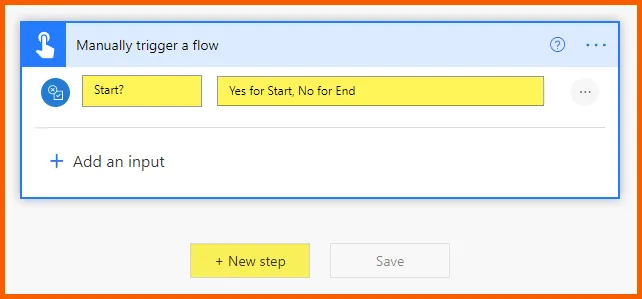
Creating the Power Automate to Excel Connector
Our next step is to establish a connection between the Power Automate component and the previously created Excel file.
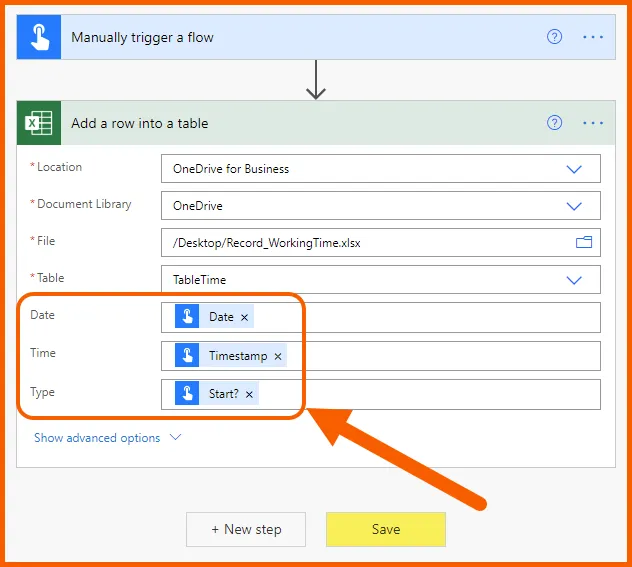
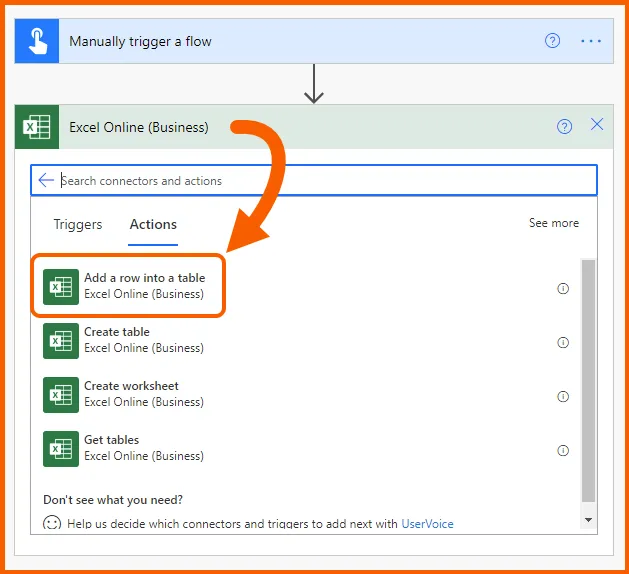
We select the “Excel Online (Business)” connector and click the “Add a row into a table” action.
Next, we define the location and library of the file along with the name of the file and the table name which entries will be stored.
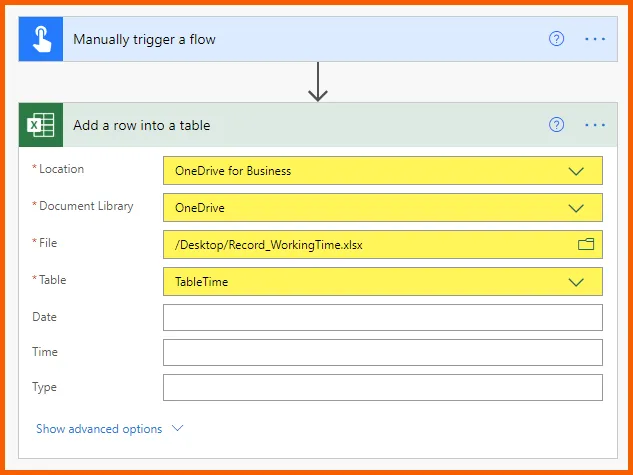
We can see in the above image that the field headers are read and displayed from the “TableTime” table we created earlier.
We need to assign what is to be placed in these fields.
Click the empty fields and select Dynamic Content and add the items listed below. Click Save when finished.
- Date -> Date
- Time -> Timestamp
- Type -> Start? (this is from the name given to the trigger)
Testing the Flow
Switch to your mobile device and launch the Power Automate app.
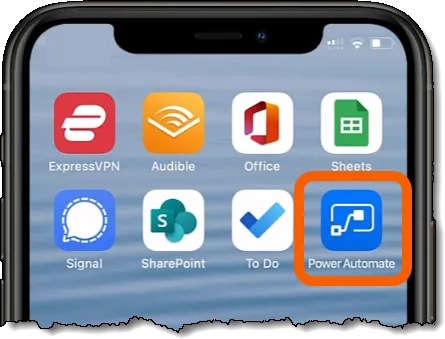
If you do not have the Power Automate app, you can download it for free using one of the below QR codes for your mobile device platform.

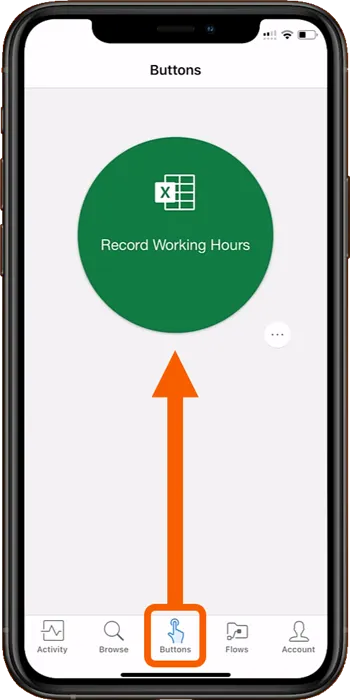
Once Power Automate has started, click the Buttons icon at the bottom center and then click “Record Working Hours”.
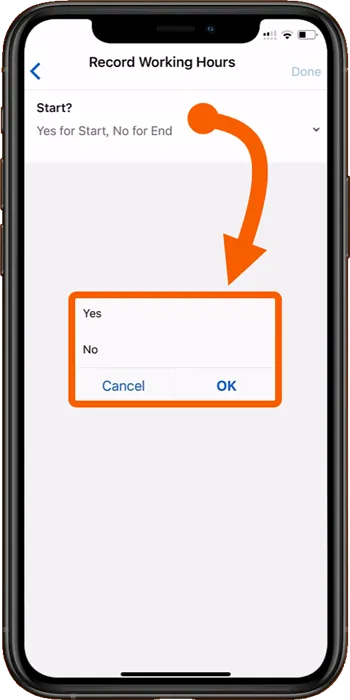
Click the “Start?” item and choose “Yes” or “No” to indicate a start time or an end time.
Examining the captured dates and times
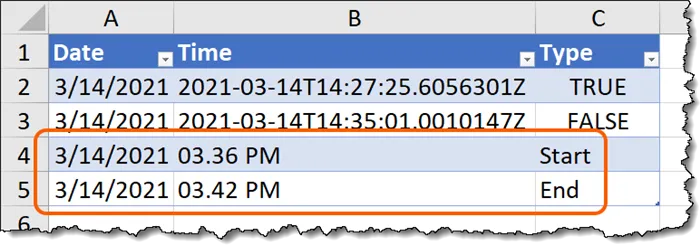
If we open the Excel file created earlier in the tutorial, we can see the recorded dates, times, and types.

Notice that a start time was recorded as a “True” while an end time was recorded as a “False”. This means that the Type field is recorded as a Boolean data type.
Let’s update the Time column to display the times in a more user-friendly format as well as have the Type column display “Start” or “End”.
This is where using functions in Power Automate comes into play.
Writing Functions in Power Automate
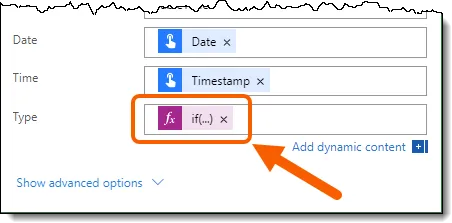
Return to the flow in Power Automate (on the Office.com website) and select the Type field that is labeled “Start?”. Instead of displaying “True” or “False” we want to see “Start” or “End.
This is where we will use an Expression (i.e., function) to examine the “Start?” field and act accordingly.
- Select the “Start?” trigger in the Type
- Select Expression
- Click in the fx field and enter if()
- Select Dynamic Content
- Click the “Start?” trigger
The formula will be updated to read:
if(triggerBody()[‘boolean’],- Click back at the end of the updated formula and type the following:
, ‘Start’, ‘End)The completed formula will appear as follows.
if(triggerBody()[‘boolean’], ‘Start’, ‘End’)NOTE: Make sure you use single quotes, not double quotes like you’re used to in Excel.
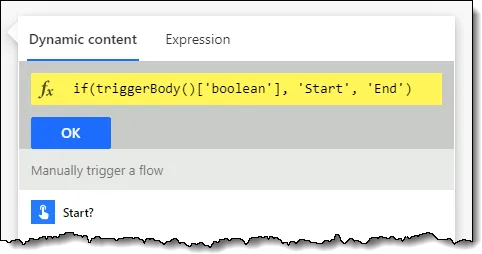
Click OK to see the revised Type field.
To update the times to a more user-friendly format, select the Timestamp trigger in the Time field.
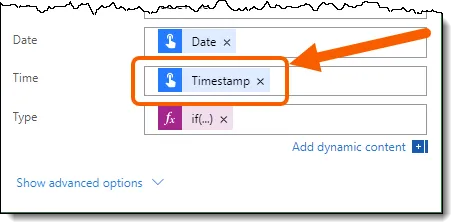
To create a function that formats the time, perform the following steps:
- Select Expression
- Click in the fx field and enter formatDateTime()
Here’s where things get a bit tricky.
When we select Dynamic Content, we don’t always see a complete list of the triggers.
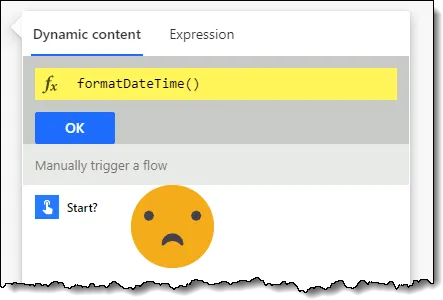
If we hover our mouse pointer over the “Timestamp” trigger, we can see the underlying no-so-user-friendly code.

If you don’t want to risk making a typo when you enter this code you can switch to the Code View by selecting the Options (three dots) button in the upper-right and select Peek Code.
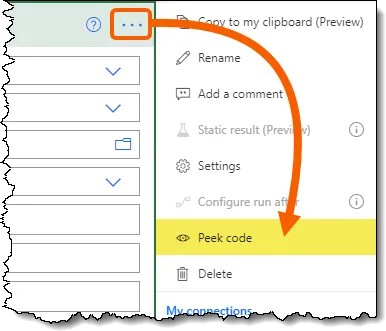
We can locate the needed code and highlight it to perform a Copy operation.
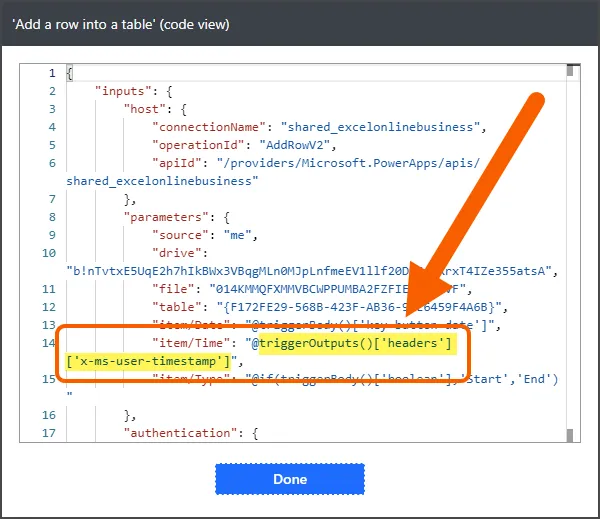
- Return to the formatDateTime function and paste the copied code in the parentheses.
- Add the formatting codes that define the look of the time. In this case, we will use the format code ‘hh:mm tt’. The “tt” is for the AM/PM notation.
- Click OK when finished.
formatDateTime(triggerOutputs()['headers']['x-ms-user-timestamp'])
Finally, click the Save button to update the “Record Working Hours” flow.
Testing the updated functions
This time, we will test the flow directly in the flow editor.
- Click the Test button in the upper-right of the window.

- Select Manually and click Save & Test.
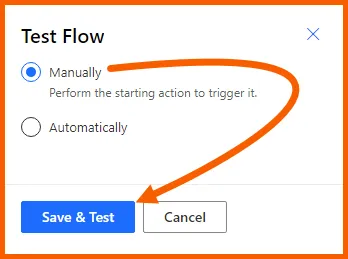
- The option for “Start?” is to be set to ON for a starting time and set to OFF for an ending time. Click Run Flow when finished.

When finished, you can see that the flow was tested successfully as well as how long it took to perform the test.
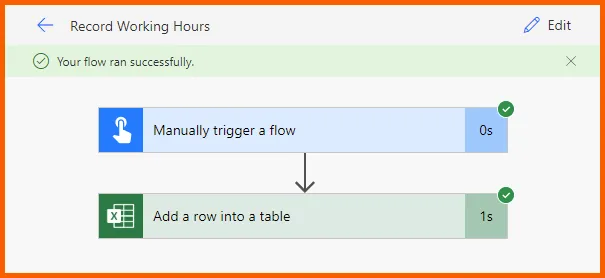
Returning to the Excel spreadsheet that stores our test results, we see the new entries with the more user-friendly formatting.
Featured Course
Black Belt Excel Package

Example #2 – Create a LinkedIn Post from Excel
This example will be constructed the other way around. We will create a LinkedIn post directly from a row in a table.
Returning to the Office.com website, we begin the first example by creating an Instant Cloud Flow.

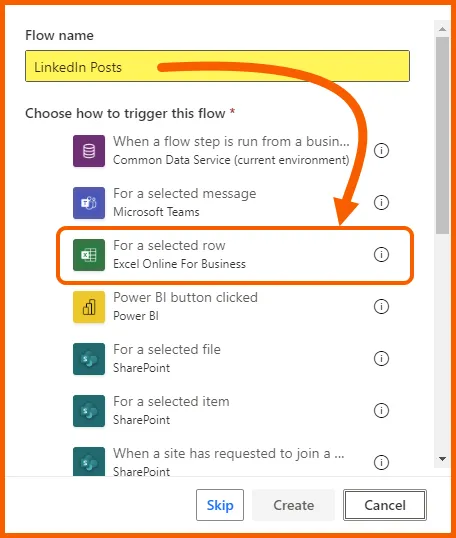
We give the name of the new flow “LinkedIn Posts” and select the trigger labeled “For a selected row”. Click Create to continue to the next step.
Defining the Excel source file
As we did in the previous example, we need to define the location, filename, and table from which to extract the link information for the LinkedIn site.
I have an Excel workbook named “LinkedIn_Posts” that contains a table named “TablePosts” to store the URLs and display text for the LinkedIn posts.
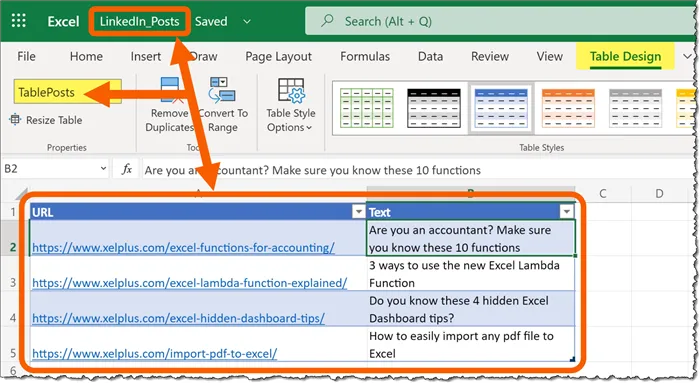
We point all the necessary options to the location, file, and table name. Click New Step to continue.

Using the LinkedIn connector
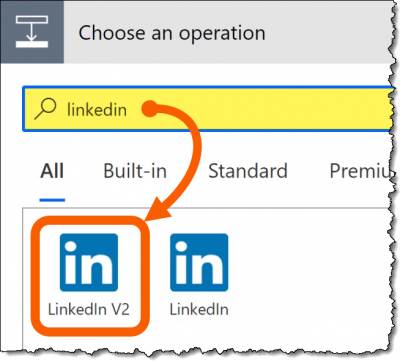
To access the LinkedIn connector, in the Choose an Operation dialog, search for “LinkedIn” and select the connector labeled “LinkedIn v2” (the most recent LinkedIn connector.)
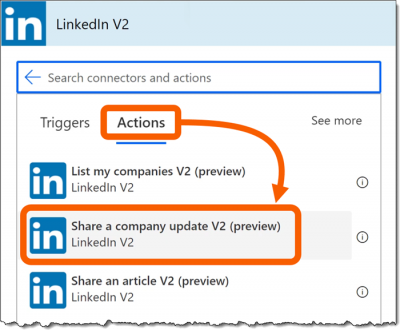
Under the Actions section, select “Share a company update V2 (preview)”
NOTE: At this point, you may need to authenticate to your LinkedIn account with your credentials.
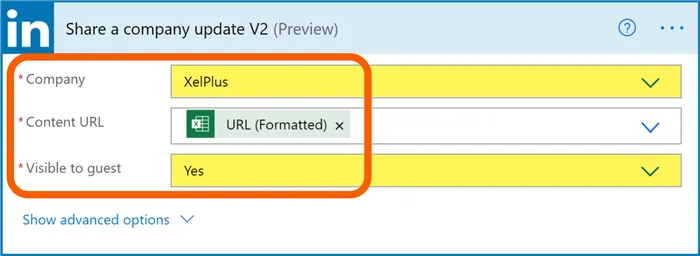
Select the desired company from the Company dropdown list.
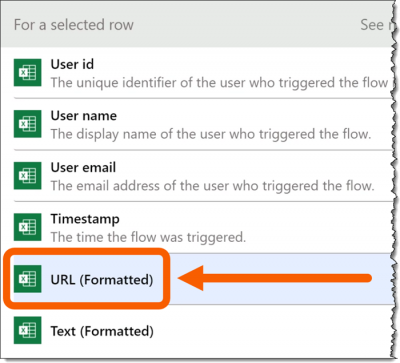
For the Content URL field, using the Dynamic Content option, select the URL (Formatted) option. This points to the URL column of our Excel table.
Set the “Visible to Guest” option to “Yes”.
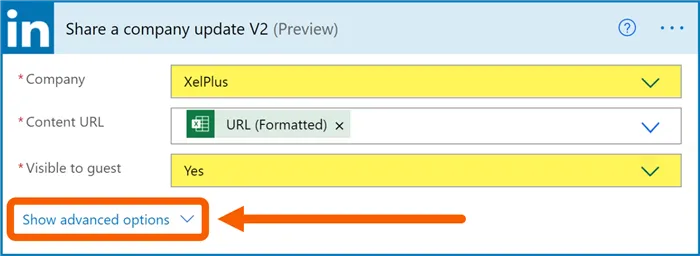
To define the text to be displayed in the LinkedIn post, expand the Advanced Options…
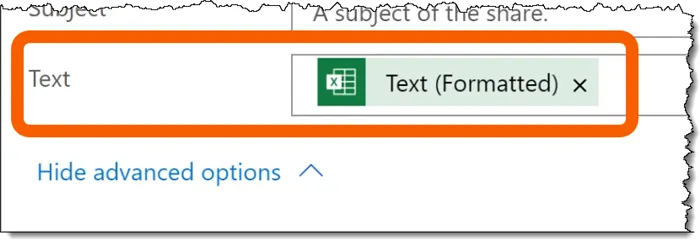
… and select the Text field and point to the Dynamic Content labeled Text (Formatted).
Click Save to complete the process.
Testing the LinkedIn flow
For Power Automate to have the ability to read your Excel files, you need to add the “Microsoft Flow for Excel” add-in to Excel.
If you have not already added this component, perform the following steps:
- Select Insert (tab) -> Get Add-ins

- Search for “Flow” or “Power Automate”

- Click ADD to install the Flow add-in.
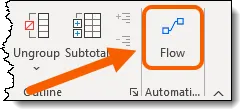
This will add a new button to the far right of the Data ribbon labeled Flow.
Uploading the LinkedIn post
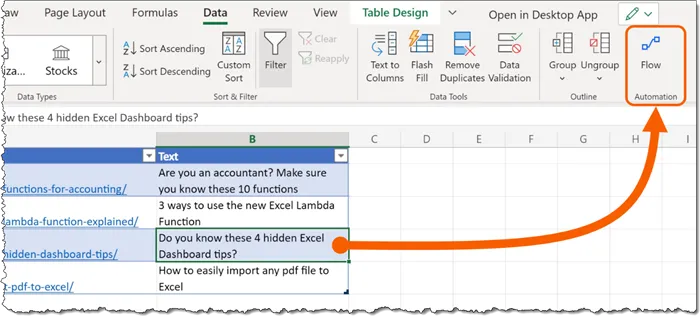
To upload the requisite LinkedIn post, select a cell on the row of the table for the desired post and click Data (tab) -> Flow.
Select the Flow created earlier named “LinkedIn Posts” and click the Run arrow.
NOTE: You may need to enter your credentials next if this is the first time you have used this add-in.
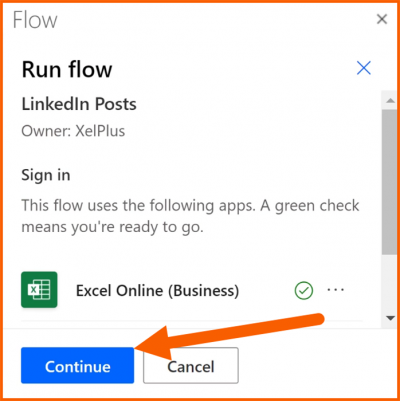
Once authenticated, click Continue.
Click “Run Flow” then click “Done”.

If we open our LinkedIn page and navigate to the Posts section, we can see our newly updated post.

This is just the beginning
Hopefully, this has provided some inspiration as to what Power Automate can do to improve your workflow efficiency.
With a small amount of imagination and likely a bit of experimentation, you will be able to create flows that will save time, improve accuracy, and maybe even provide a twinge of excitement to your day.
Leila Gharani
I'm a 6x Microsoft MVP with over 15 years of experience implementing and professionals on Management Information Systems of different sizes and nature.
My background is Masters in Economics, Economist, Consultant, Oracle HFM Accounting Systems Expert, SAP BW Project Manager. My passion is teaching, experimenting and sharing. I am also addicted to learning and enjoy taking online courses on a variety of topics.


