Accessing the Find/Replace feature
The Find/Replace feature can be activated by selecting the Home tab, Editing (group), clicking the button labeled “Find & Select”, then clicking “Find…” or “Replace…”
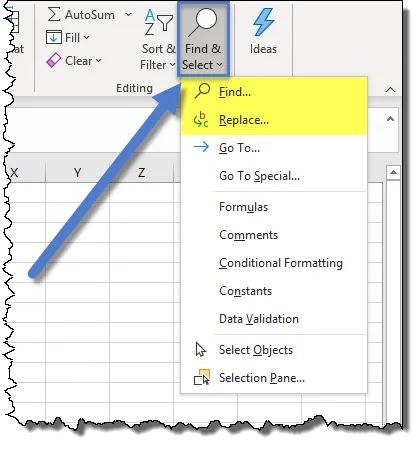
If you are the type of user that prefers launching features through keyboard shortcuts, you can activate Find via the CTRL-F key combination or Replace via the CTRL-H key combination.
Using the Find/Replace feature
Assuming you are already familiar with the basic operational use of the Find and Replace feature, let’s dive a bit deeper into the lesser known options of the tool.
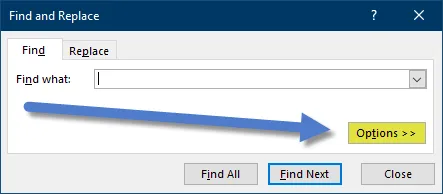
The interesting options can be found by clicking the “Options >>” button (appropriately named).
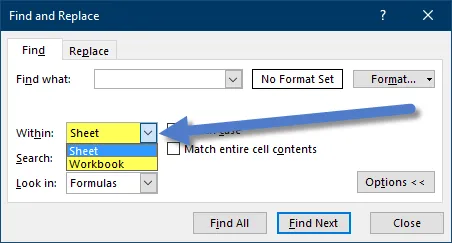
The first option, labeled “Within”, is the ability to limit your search for text to the active sheet or search all sheets in the workbook.
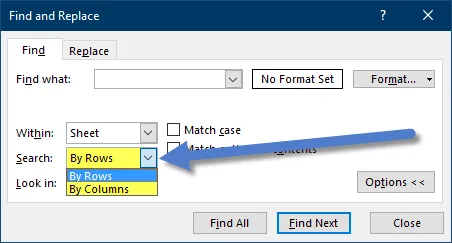
The option labeled “Search” dictates the search direction; either down the rows or across the columns.
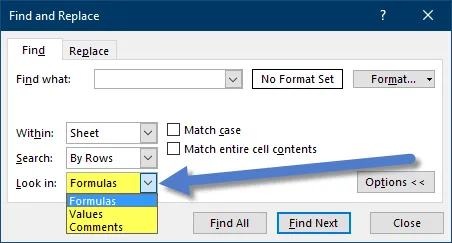
The “Look In” option controls what to examine. There are three options:
- Formulas – examine what was typed in the cells, either static text or text within a formula
- Values – examine what is displayed in a cell, either static text or the result of a formula
- Comments – examine the text entered in cell comments
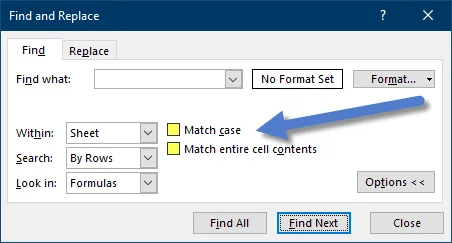
The “Match case” and “Match entire cell contents” work the same way as the “Match case” and “Find whole words only” options in the Find/Replace feature of Microsoft Word.
Performing the Find
One of the best options of the Find feature of the ability to list all the locations that contain your search criteria. This is performed using the “Find All” option.
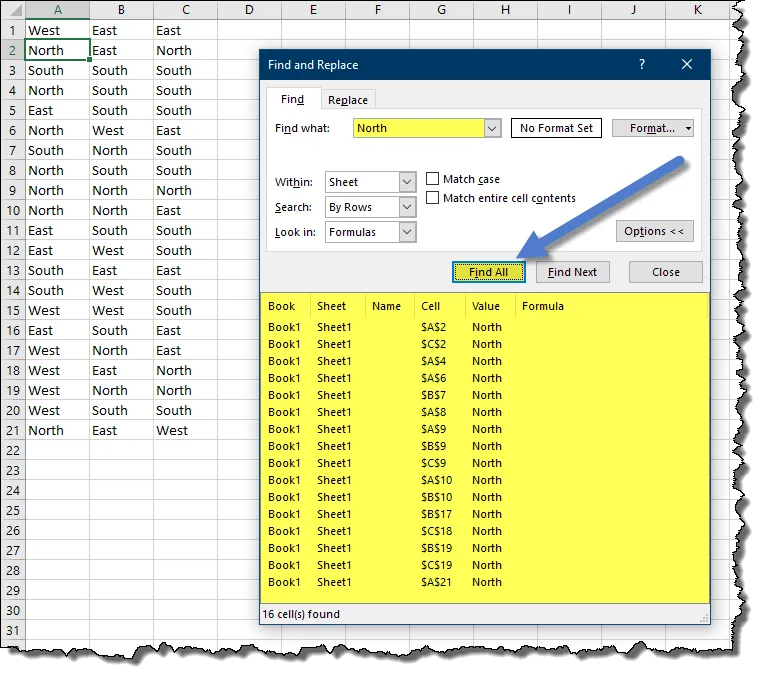
Examining this list is often more efficient than “walking” though each location one at a time via the “Find Next” option.
By clicking on one of the entries in the list, Excel will place your cursor in the discovered cell.
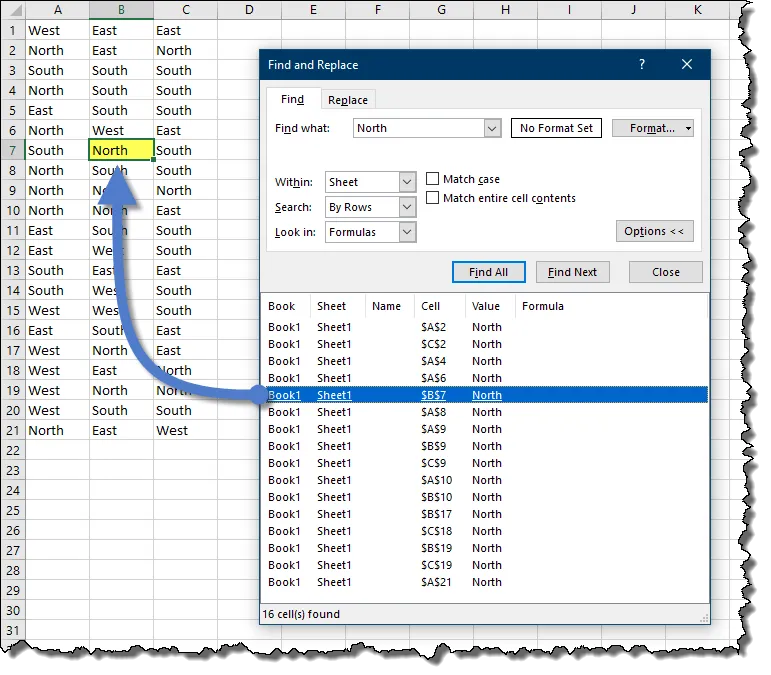
One of the lesser-known abilities is the ability to select multiple list items and have the associated cells become selected.
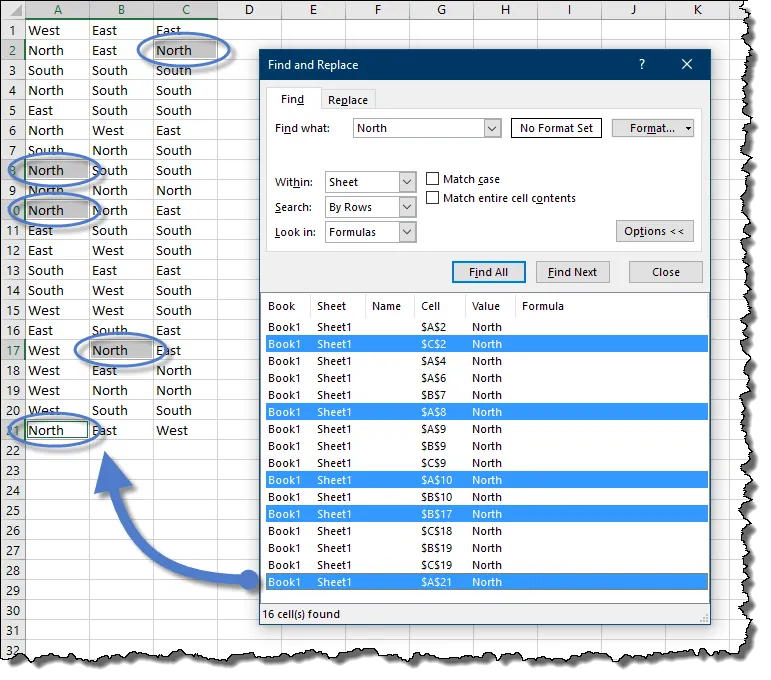
If you wish to select all the items in the list, click on any single item and press the CTRL-A key combination on your keyboard.
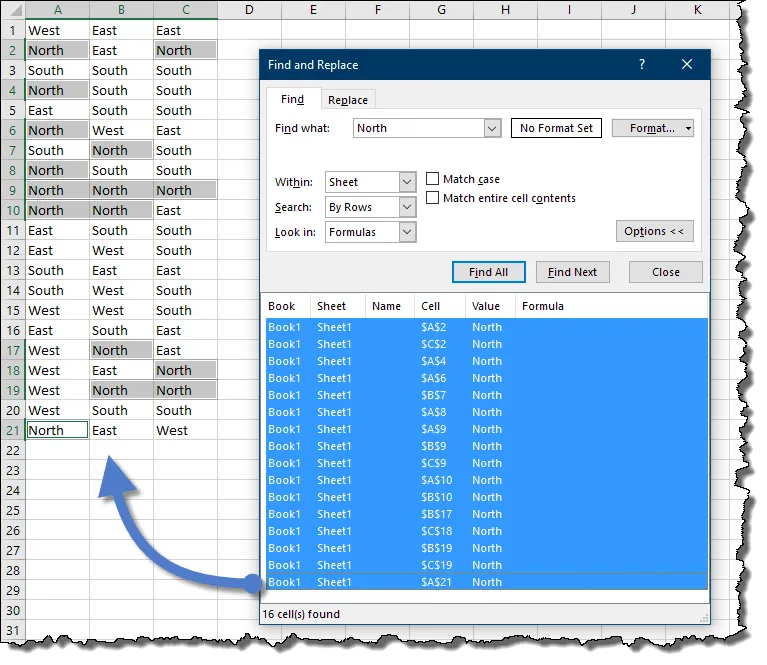
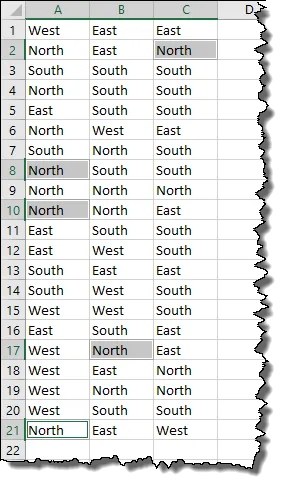
At this point, we can close the Find dialog box and the cells will remain selected.
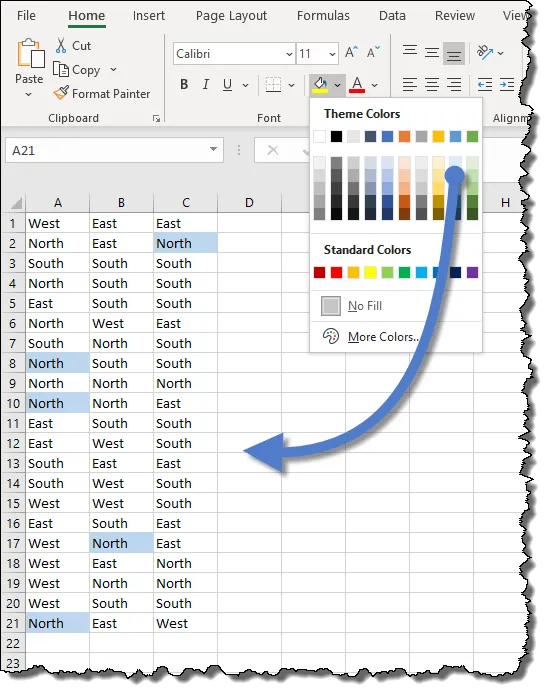
We can now perform bulk modifications, such as set the fill color on all selected cells.
Find/Replace with formatting
Another option is the ability to replace one set of text with another and apply formatting to the new text at the same time.
To demonstrate, press the key combination CTRL-H on your keyboard to open the Replace tab of the Find and Replace dialog box.
Enter the text you wish to find in the “Find what” field and the text you want to replace it with in the “Replace with” field.
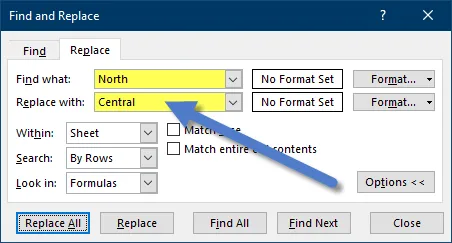
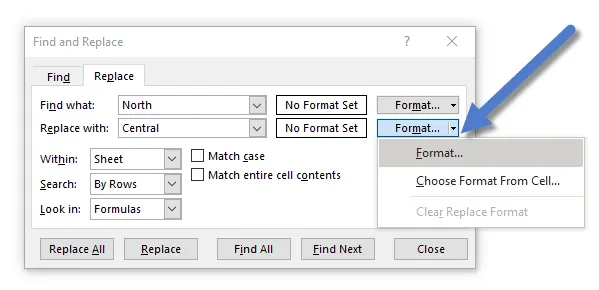
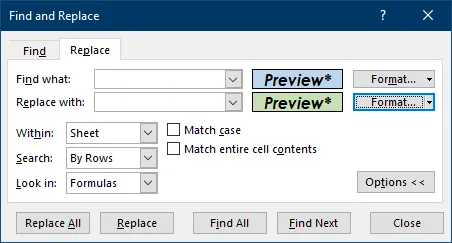
To the far right of the “Replace with” field, click the small down arrow next to the word “Format…” and select “Format…”
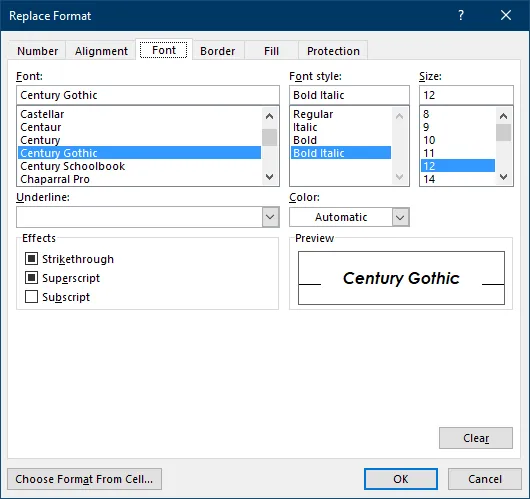
This will open the Replace Format dialog box. This has all the same options that a traditional Format Cells dialog box possesses.
We can change the font style, font color, font size, number style, alignment, border, cell color, etc…
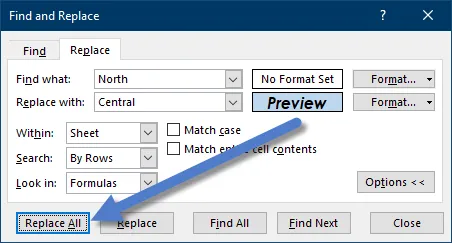
Select any and all formatting options you wish and click the “Replace All” button.
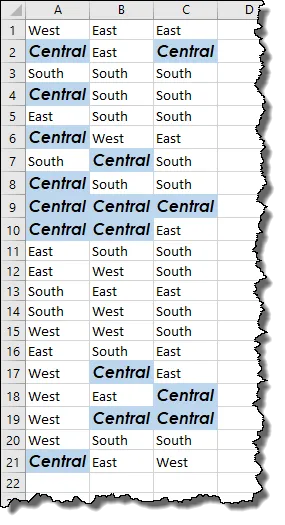
Replacing one cell color with another cell color
Let’s try a more exotic use for the Find/Replace tool. Suppose you wish to replace all the cells that contain one color with a different color; such as all light blue cells with a light green fill color.
Return to the Replace feature by pressing CTRL-H. Because we are not looking for any particular text, we will clear the fields for both the “Find what” and “Replace with” fields.
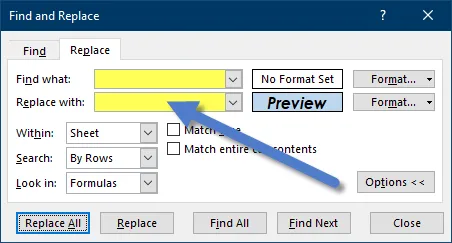
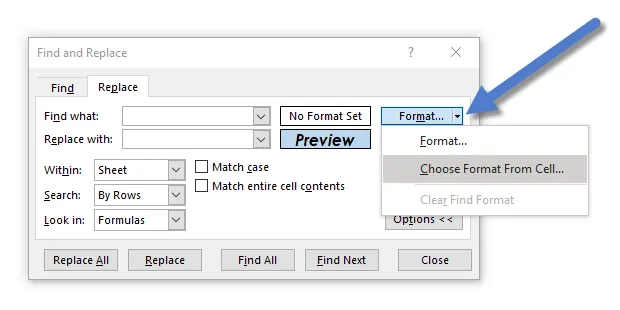
It’s likely that we don’t know the exact shade of light blue we are searching for. Using the “Find what” option, click the small down arrow to the right of the select the “Format…” option and select “Choose Format From Cell…”
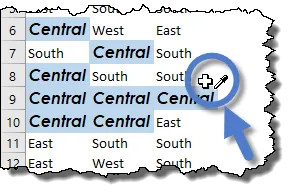
Click on any cell that possess the light blue fill color.
Now, using the “Replace with” option, select the small down arrow to the right of the select the “Format…” option and select “Format…”
In the Replace Format dialog box, select the Fill tab and select the applicable shade of light green.
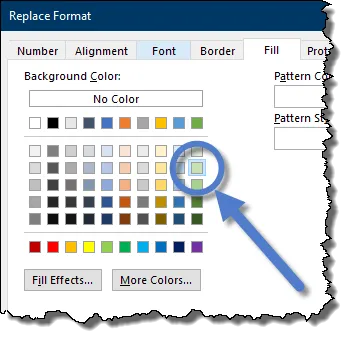
Click “Replace All” to perform the search and replacement operation.
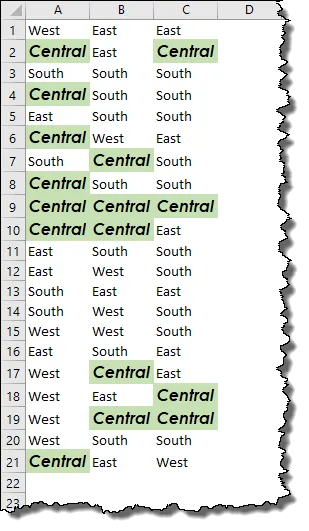
What if we miss a few items?
If you notice from the below results, certain cells did not receive the updated light green color even though they possessed the appropriate light blue fill color.
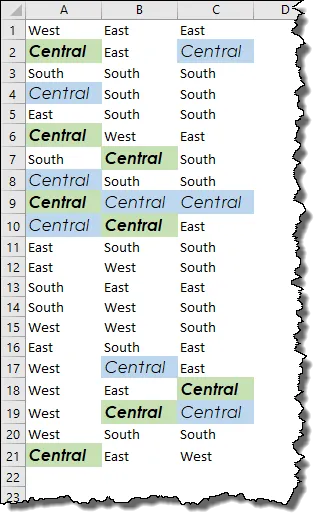
The reason is that when we clicked on a cell to define the current cell color, we also (unknowingly) defined the font size, font color, font style, cell alignment, border, bold, italic, underline attributes, etc…
In other words, all visual aspects of the cell.
The cells that are not bold failed to receive the light green fill color because the Replace operation was only looking for cells that possess bolded text.
In order to select cells based on their fill color and not any of the other cell’s visual attributes, we need to search for the color only.
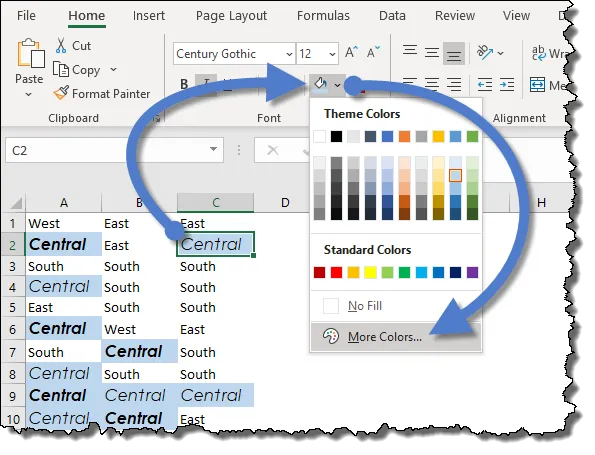
An easy way to determine the original search color is to select an existing cell with the light blue fill color and select the down arrow next to the “Fill Color” button and select “More Colors…”.
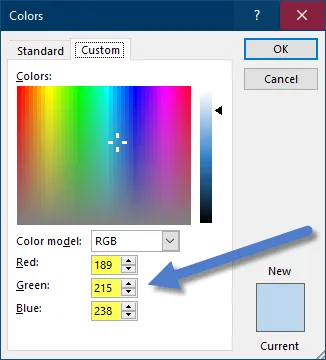
In the Colors dialog box, select the “Custom” tab and record the values located in the “Red”, “Green”, and “Blue” fields.
Cancel the dialog box and return to the “Replace” dialog box (CTRL-H).
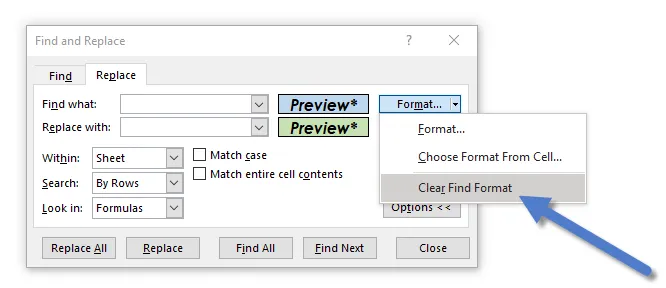
Because the Replace feature retains the previous selections, we need to clear the format options from the “Find what” option. Using the “Find what” option, click the small down arrow to the right of the “Format” option and select “Clear Find Format”.
Click the small down arrow to the right of the “Format” option and select “Format”.
Select the Fill tab and then click the “More Colors” button to access the fill color pallet.
On the “Custom” tab, enter the same “Red”, “Green”, “Blue” code number recorded from the earlier step.
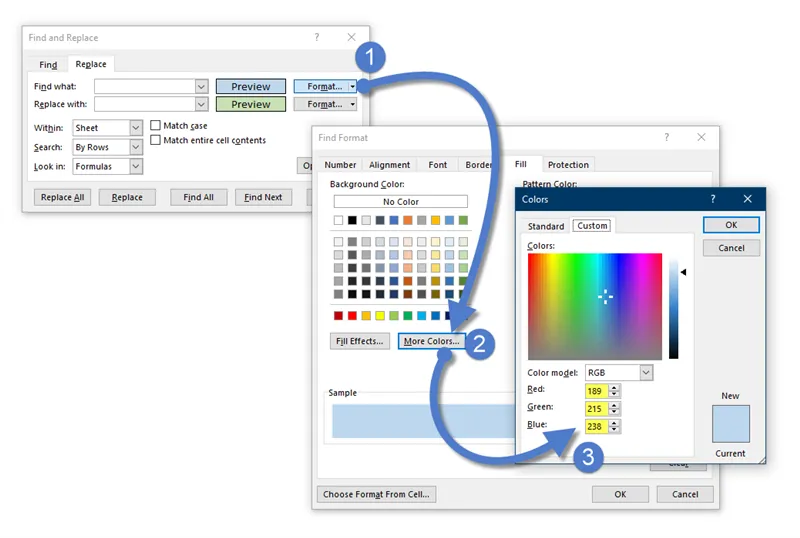
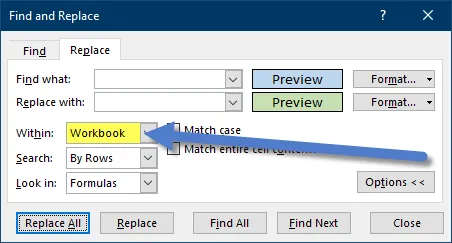
Because we wish to perform this modification on all sheets in the workbook, change the “Within” option to “Workbook” and click “Replace All”.
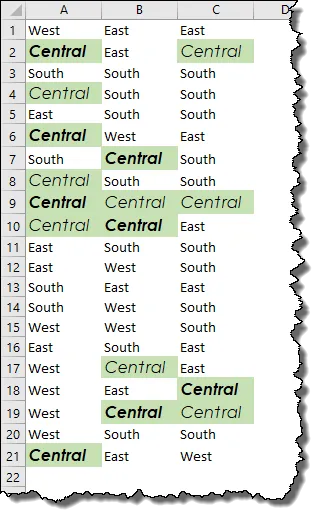
Every cell on every sheet in the workbook that possessed the original light blue fill color has been updated with the new light green fill color.
Leila Gharani
I'm a 6x Microsoft MVP with over 15 years of experience implementing and professionals on Management Information Systems of different sizes and nature.
My background is Masters in Economics, Economist, Consultant, Oracle HFM Accounting Systems Expert, SAP BW Project Manager. My passion is teaching, experimenting and sharing. I am also addicted to learning and enjoy taking online courses on a variety of topics.


