In this tutorial you’ll quickly learn the correct syntax to create a VBA message box (also referred to as a pop-up dialogue box) in Excel. I first show you how to create a message box that displays a simple message, and then we expand on this to include “YES” & “NO” buttons and perform an action based on the selected button.
The message box function (its official name is MsgBox) is a very easy to use, built-in feature in VBA that allows you to communicate with the user. The message box does not have to be designed, merely called.
In addition to displaying informative messages to the user, the MsgBox function can also solicit input from the user by way of the buttons displayed in the message box. Selections such as “Yes”, “No”, “OK”, and “Cancel” can be captured and used in decision making structures in VBA.
Common uses of a message box are to inform the user that a macro has finished running, or to request confirmation of an action prior to execution of that action.
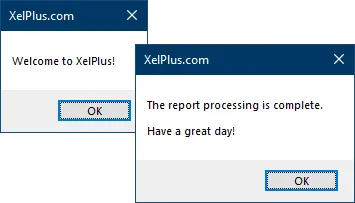
Task 1: Create a Welcome Message for the User
This macro will display a message box welcoming the user to the workbook.
Open the Visual Basic editor by selecting Developer (tab) -> Code (group) -> Visual Basic or by pressing the key combination ALT-F11 on your keyboard.

We will need to insert a module sheet into your workbook. This is performed by right-clicking on any reference on the workbook in the Project Explorer (upper left of the VBA Editor) and selecting Insert -> Module.
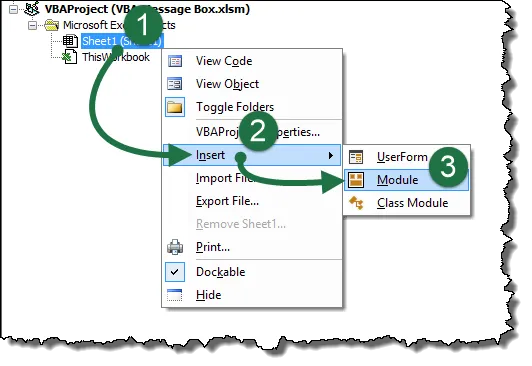
In the code window of the newly created module sheet type the following code.
Sub Simple_MsgBox()
End Sub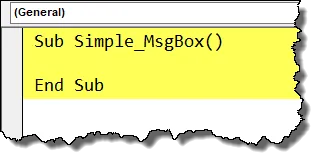
The syntax for the MsgBox function is as follows:
MsgBox(Prompt, [Buttons], [Title], [HelpFile], [Context]
The official Microsoft descriptions of these parameters are:
- Prompt – Required. String expression displayed as the message in the dialog box. The maximum length of prompt is approximately 1024 characters, depending on the width of the characters used. If prompt consists of more than one line, you can separate the lines by using a carriage return character (Chr(13)), a linefeed character (Chr(10)), or carriage return – linefeed character combination (Chr(13) & Chr(10)) between each line.
- Buttons – Optional. Numeric expression that is the sum of values specifying the number and type of buttons to display, the icon style to use, the identity of the default button, and the modality of the message box. If omitted, the default value for buttons is 0.
- Title – Optional. String expression displayed in the title bar of the dialog box. If you omit title, the application name is placed in the title bar.
- HelpFile – Optional. String expression that identifies the Help file to use to provide context-sensitive Help for the dialog box. If helpfile is provided, context must also be provided.
- Context – Optional. Numeric expression that is the Help context number assigned to the appropriate Help topic by the Help author. If context is provided, helpfile must also be provided.
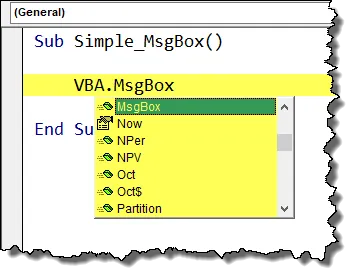
The MsgBox function can be directly typed into the code window or accessed via Intellisense by typing “VBA.” and selecting “MsgBox” directly from the global library.
The MsgBox function is also accessible through the Interaction class. This is accessed by typing “VBA.Interaction.MsgBox”.
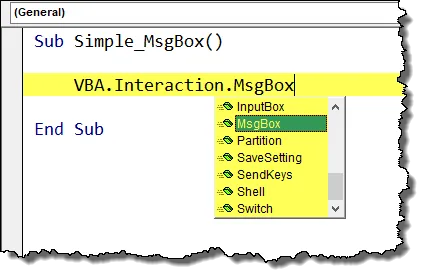
Regardless of how you type this, you get the same result.
Creating our Message Box
In the newly created procedure named “Simple_MsgBox”, enter the following code.
MsgBox “Hello”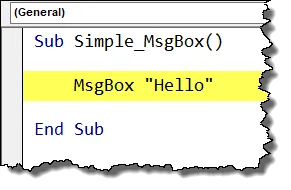
This is an example of a message box in its simplest form.
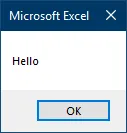
When we run the procedure (with your cursor in the code, press F5), we see the following result.
Adding and Customizing Other Features
The first customization deals with the button style. The default button style is to display the “OK” button. There are several pre-configured button styles, each presenting their own buttons. Some examples are:
vbAbortRetryIgnore, vbYesNo, vbYesNoCancel, vbOk, vbOkCancel, and vbRetryCancel
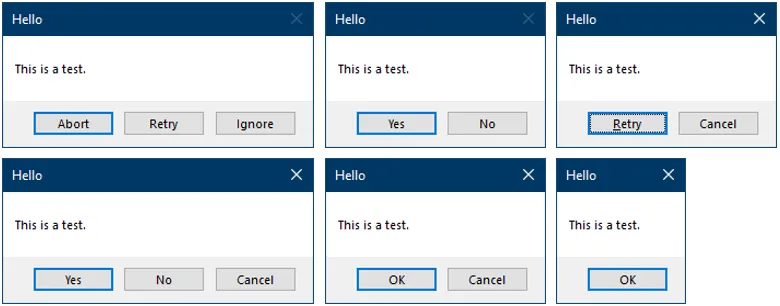
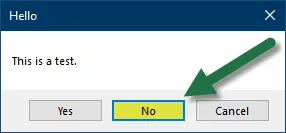
We can also define which button is pre-selected by using the “vbDefaultButtonX” option. In a vbYesNoCancel configuration, vbDefaultButton1 would pre-select the “Yes” button, where vbDefaultButton2 would pre-select the “No” button.
Since are only displaying a message, the default “OK” button will suffice so we will skip this argument.
Because this MsgBox function mimics the same structure of a regular Excel function, if you skip an argument you need to supply the comma as a placeholder.
The second customization will be for the wording in the Title Bar of the dialog box. If no title is provided, the application’s title is displayed, such as “Microsoft Excel”. Because there is limited space in the Title Bar, try to keep this text brief.
Our updated macro appears as follows.
MsgBox “Hello”, ,”Welcome!”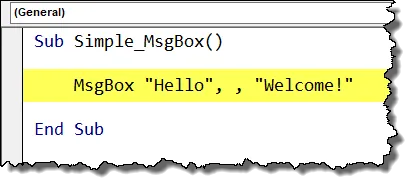
Another way to write the statement is to use embedded titles for the arguments.
MsgBox prompt:=”Hello”, Title:=”Welcome!”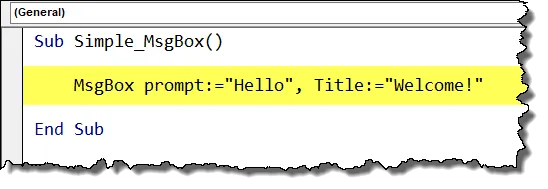
This allows us to list the arguments in any order we see fit and serves as a rudimentary form of inline documentation.
Lastly, let’s personalize the prompt by reading the user’s name form the applications User Name property. This is stored in the application’s Options section (File -> Options -> User name).
The updated code appears as follows
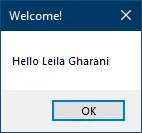
MsgBox “Hello ” & Excel.Application.UserName, , “Welcome!”
Press F5 to run the macro and observe the results.
Storing the Selected Button
When the user clicks a button in a message box, a code is stored in a permanent variable called vbMsgBoxResult.

This will come in handy in our next example when we must perform an action based on the selected button. For now, we ignore the user’s selection. Clicking the OK button will discard the message box without any further actions.
Creating a Launch Button
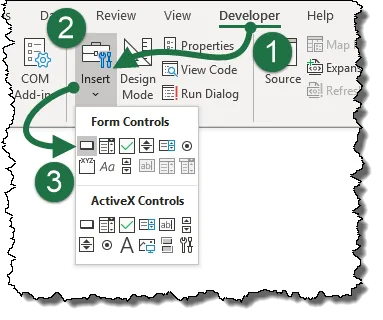
We need a way for the user to run the macro and using F5 is not an easy way for users to remember. We want to give them a button to press. To create a launch button, select Developer (tab) -> Controls (group) -> Insert -> Form Controls -> Button.
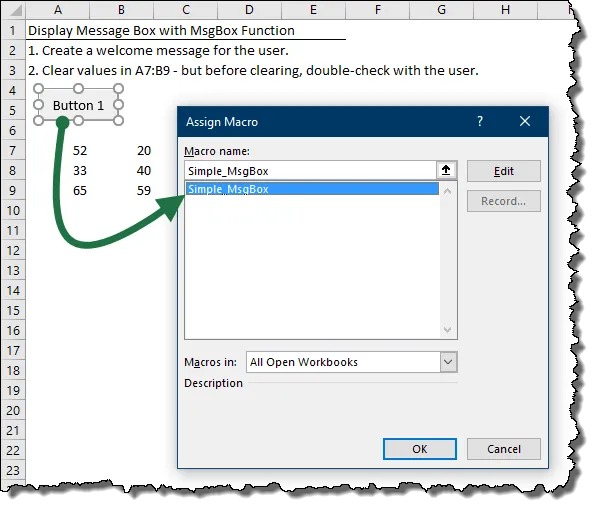
Draw a small rectangle on the screen and select the “Simple_MsgBox” macro form the list of macros in the Assign Macro dialog box.
Replace the default text on the button with “Welcome” and consider adding symbols to the buttons.
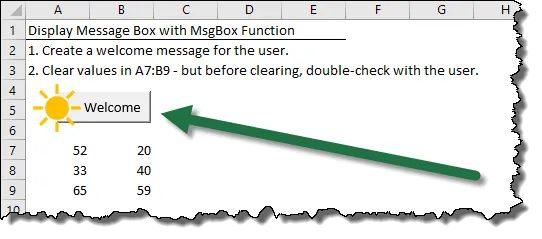
The symbol library (available by clicking Insert (tab) -> Illustrations (group) -> Icons) has a large collection of simple objects that are ideally suited for this use.
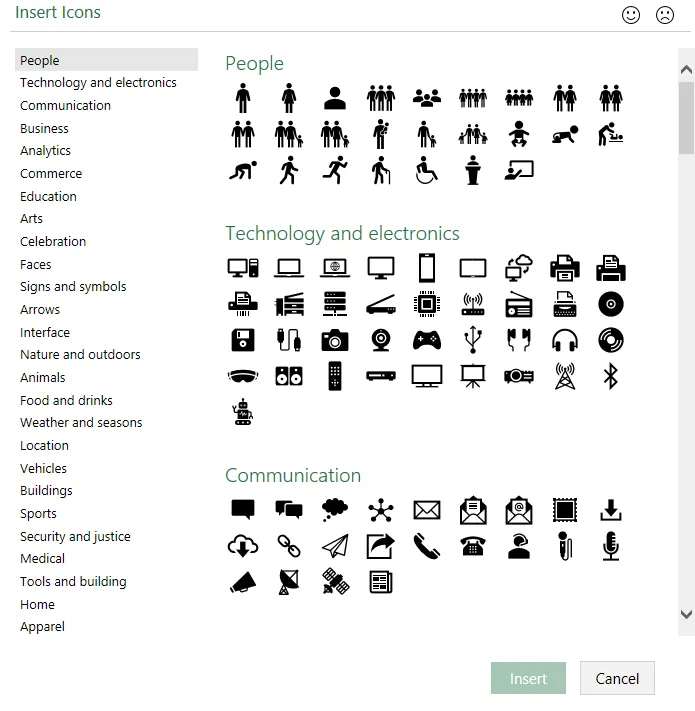
If you elect to use symbols with your buttons, make sure that the following actions are performed:
- Make sure the symbol is in front of the launch button. (right-click on the symbol and select “Bring to Front”)
- Assign the same macro to the symbol. (right-click on the symbol and select “Assign Macro…” and select the same macro assigned to the launch button)
- Position and group the button and symbol so they will move and resize as a single object. (right-click -> group)
When we click the button, we see the updated message box.

Using Additional Features
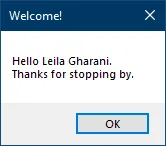
We will enhance out message box with a second line of text. Because we cannot create a new line of text by hitting the Enter key in your text, we need to use a VBA command to initiate a new line. This is performed using the VBA constant called vbNewLine. Observe the updated code below.
MsgBox “Hello ” & Excel.Application.UserName &“.”& VBA.Constants.vbNewLine & _
	“Thanks for stopping by.”, , “Welcome!”
If you prefer the labeled version, the code would appear as follows.
MsgBox Prompt:=“Hello ” & Excel.Application.UserName &“.”& VBA.Constants.vbNewLine & _
	“Thanks for stopping by.”, Title:=“Welcome!”
Select the code and press F5 to view the results.
Task 2: Clear Values based on User’s Response
This macro will prompt the user to clear the contents of a range of cells. If the user selects “Yes”, we will clear the cell range. If the user selects “No”, we will exit the macro. The finished dialog box will appear as follows.
Because we must process a decision, we will examine the button pressed by the user do decide how to proceed. This will use information stored in the automatically created variable named vbMsgBoxResult.

We begin by creating a new procedure named “Yes_No_MsgBox”.
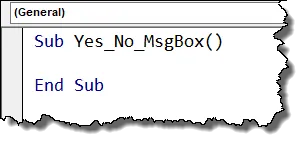
To use our user’s response in a decision structure, we will transfer the captured response from the vbMsgBoxResult variable and store it in a variable of our own named “Answer”. This variable will be defined as a vbMsgBoxResult data type.
Dim Answer As VbMsgBoxResult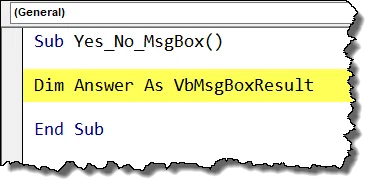
Next, we will transfer the contents of the automatically captured response to our “Answer” variable created in the previous step. Notice that we must place all the MsgBox arguments inside parentheses. Because we are using the MsgBox more like an Excel function as opposed to an action, we must follow the conventions of formula structures.
Answer = MsgBox(“Are you sure about this?”, vbYesNo + vbQuestion + vbDefaultButton2, “Clear cells”)
Using the plus sign, we can combine dialog box features such as buttons, icons, and default selections.
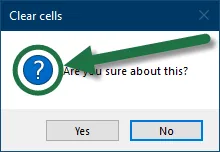
Note: In the above example, we are not only customizing the buttons, but we are also customizing a displayed icon in the message box. The “vbQuestion” constant will display a blue circle with a white question mark.
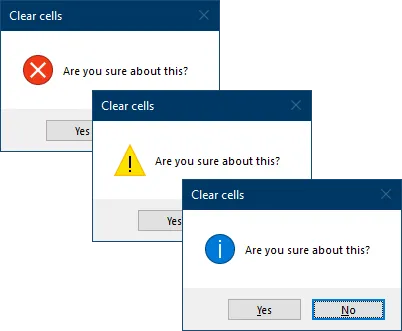
Other options include “vbCritical”, “vbExclamation”, and “vbInformation”.
The next step is to examine the captured response in the variable “Answer” and decide what action to take. If the user presses the “Yes” button, we will clear the range of cells A7 through B9. If the user presses any other button (in this case, “No”), we will exit the procedure.
If Answer = vbYes Then
	Range(“A7:B9”).Clear
Else
	Exit Sub
End If
The completed code appears as follows.
Sub Yes_No_MsgBox()
Dim Answer As VbMsgBoxResult
	Answer = MsgBox("Are you sure about this?", vbYesNo + vbQuestion + vbDefaultButton2, "Clear cells")
	If Answer = vbYes Then
    		Range("A7:B9").Clear
	Else
    		Exit Sub
	End If
End Sub
Creating a Launch Button
We will need a way for the user to run the macro so we will create a new button in the same way we created the previous macro’s button. The only difference will be what is written on the button and the assignment of the “Yes_No_MsgBox” macro.
Running the Macro
Pressing the “Clear” button, we are presented with the following dialog box.
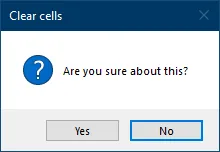
Observe that the default selected button is the “No” button.
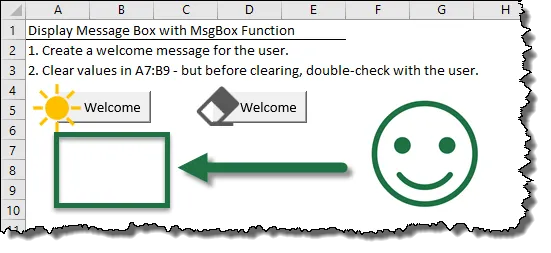
If the user presses the “No” button, no action takes place. If we rerun the macro but select the “Yes” button, cells A7:B9 are cleared of their contents.
Practice Workbook
Feel free to Download the Workbook HERE.
Leila Gharani
I'm a 6x Microsoft MVP with over 15 years of experience implementing and professionals on Management Information Systems of different sizes and nature.
My background is Masters in Economics, Economist, Consultant, Oracle HFM Accounting Systems Expert, SAP BW Project Manager. My passion is teaching, experimenting and sharing. I am also addicted to learning and enjoy taking online courses on a variety of topics.


